
AWS: Configuring an EKS Cluster
Requirements
- An AWS Account
- Follow this guide with an AWS IAM User that has
AdministatorAccess
This guide provides two options for creating your cluster, using eksctl (recommended) or using the AWS Console.
Option 1: Create a cluster via eksctl
eksctleksctl is the official CLI tool for AWS EKS. It is the simplest way to create a cluster for use with Prodvana.
- Install
eksctlin an environment where you have theawscli tool installed and configured with an account withAdministratorAccess. - Run the following command to create a simple EKS cluster using the AWS recommended template:
eksctl create cluster --name my-cluster --region <region-code> --instance-types m5a.large
We do not recommend using the
--fargateoption
- Once
eksctlcompletes, you're cluster has been created! - To validate the cluster is ready to be used as a Prodvana Runtime:
- Install and authenticate
[pvnctl](https://docs.prodvana.io/docs/pvnctl)in the same environment you raneksctl - Ensure you are authenticated with
awswith the same user you used to create the cluster.
- Install and authenticate
- Run
pvnctl preflight k8s(more information here: pvnctl preflight)- follow the prompts, and select the EKS cluster you created from the list. (it will look something like
<identity>@<cluster-name>.<region>.eksctl.io) - This will run a series of checks to ensure you can successfully deploy the Prodvana Agent to your new cluster.
- follow the prompts, and select the EKS cluster you created from the list. (it will look something like
Option 2: Create a cluster via the AWS Console
In the AWS Console, make sure to select the region you want to deploy the cluster into.
Create a VPC for the EKS Cluster
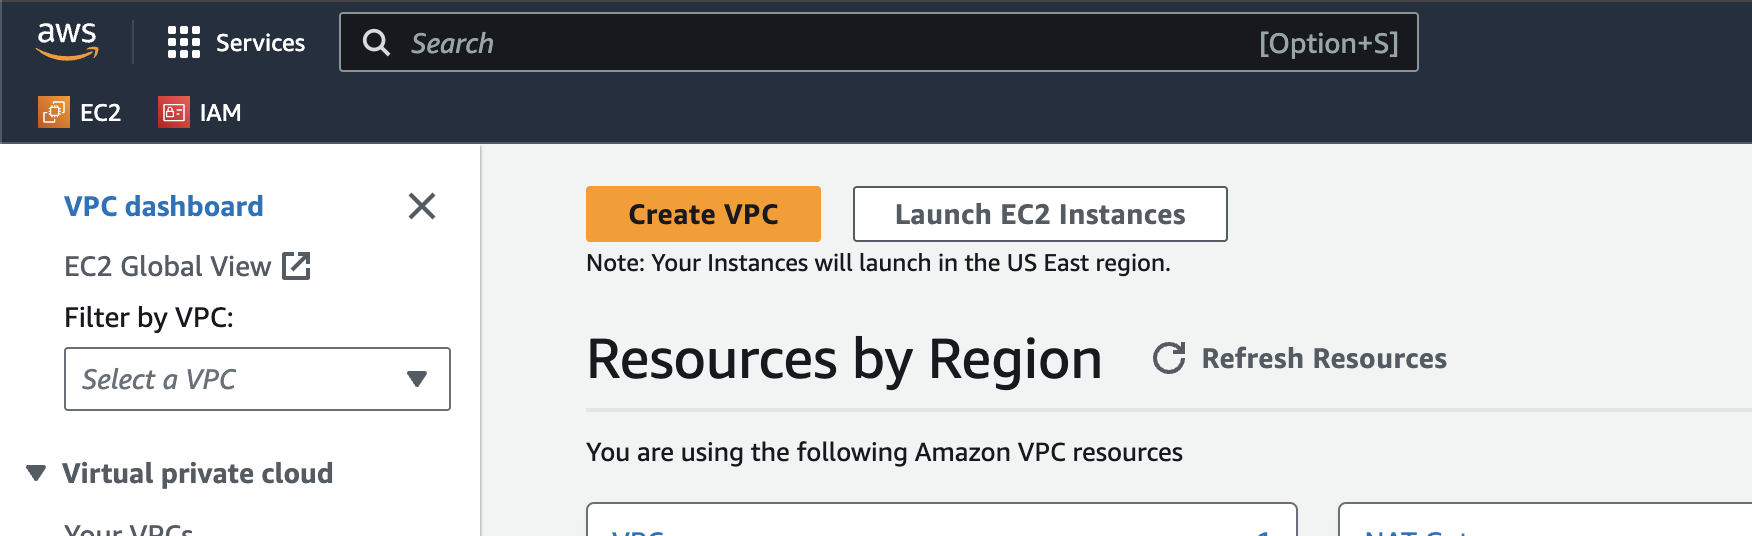
- Go to the VPC Console page
- click the “Create VPC” button
- Ensure the VPC and more option is selected
- In the Name tag auto-generation section, change the default name to
prodvana-runtimeor similar. This will help generate human readable names. - Set the NAT Gateways option to 1 Per AZ
- All other options should be kept at the default. As of writing the defaults for each field are:
- IPv4 CIDR block = 10.0.0.0/16 (if this changes, use the new AWS default)
- IPv6 CIDR block = No IPv6 CIDR block
- Tenancy = Default
- Number of Availability Zones = 2
- Number of public subnets = 2
- Number of private subnets = 2
- VPC endpoints = S3 Gateway
- DNS Options:
- ✅ Enable DNS hostnames
- ✅ Enable DNS resolution
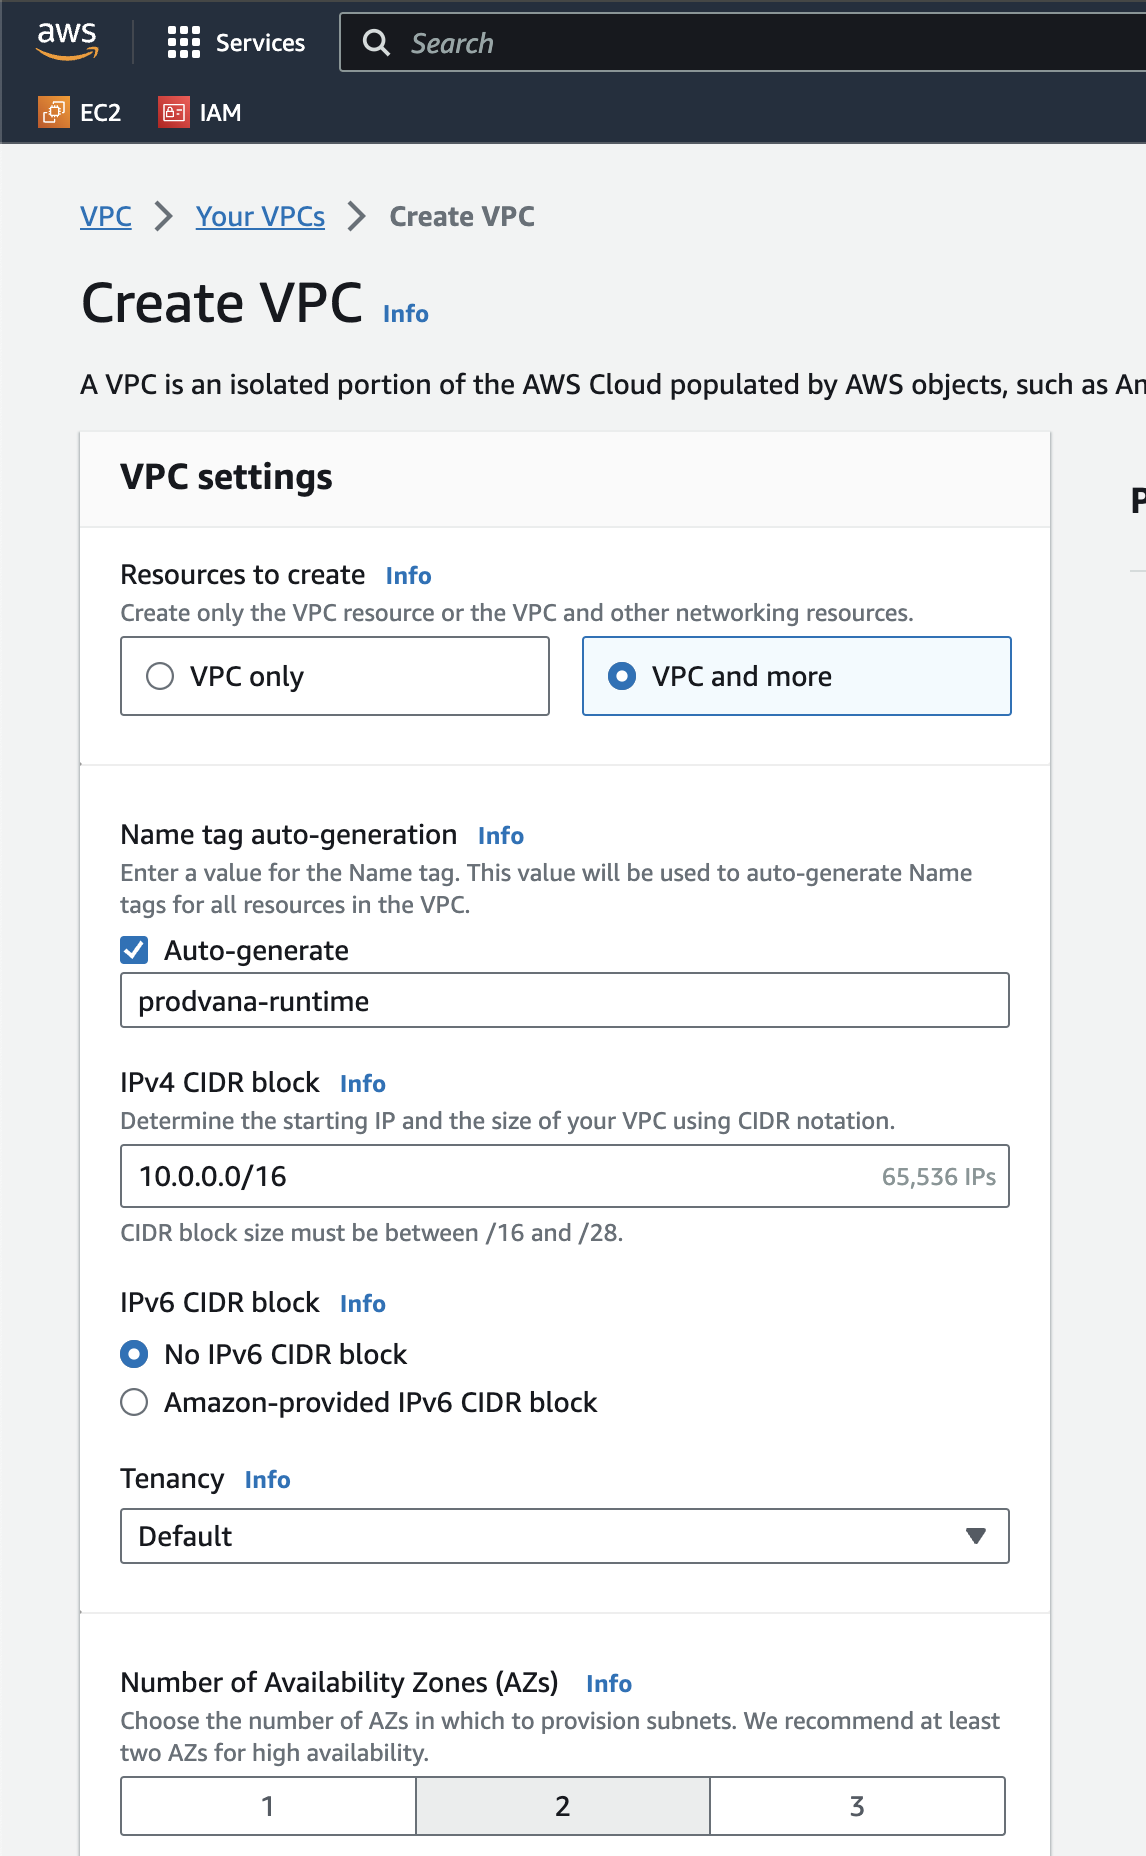

- Click Create VPC
Create IAM roles needed by the EKS Cluster
- Follow this guide to create an IAM role for the EKS cluster nodes: https://docs.aws.amazon.com/eks/latest/userguide/service_IAM_role.html#create-service-role
- TODO
Create the EKS Cluster
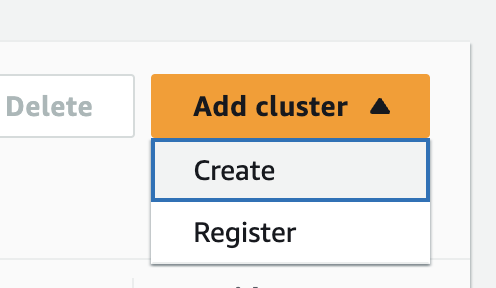
- Go to the EKS Console page
- Click the Create cluster button and select Create from the dropdown.
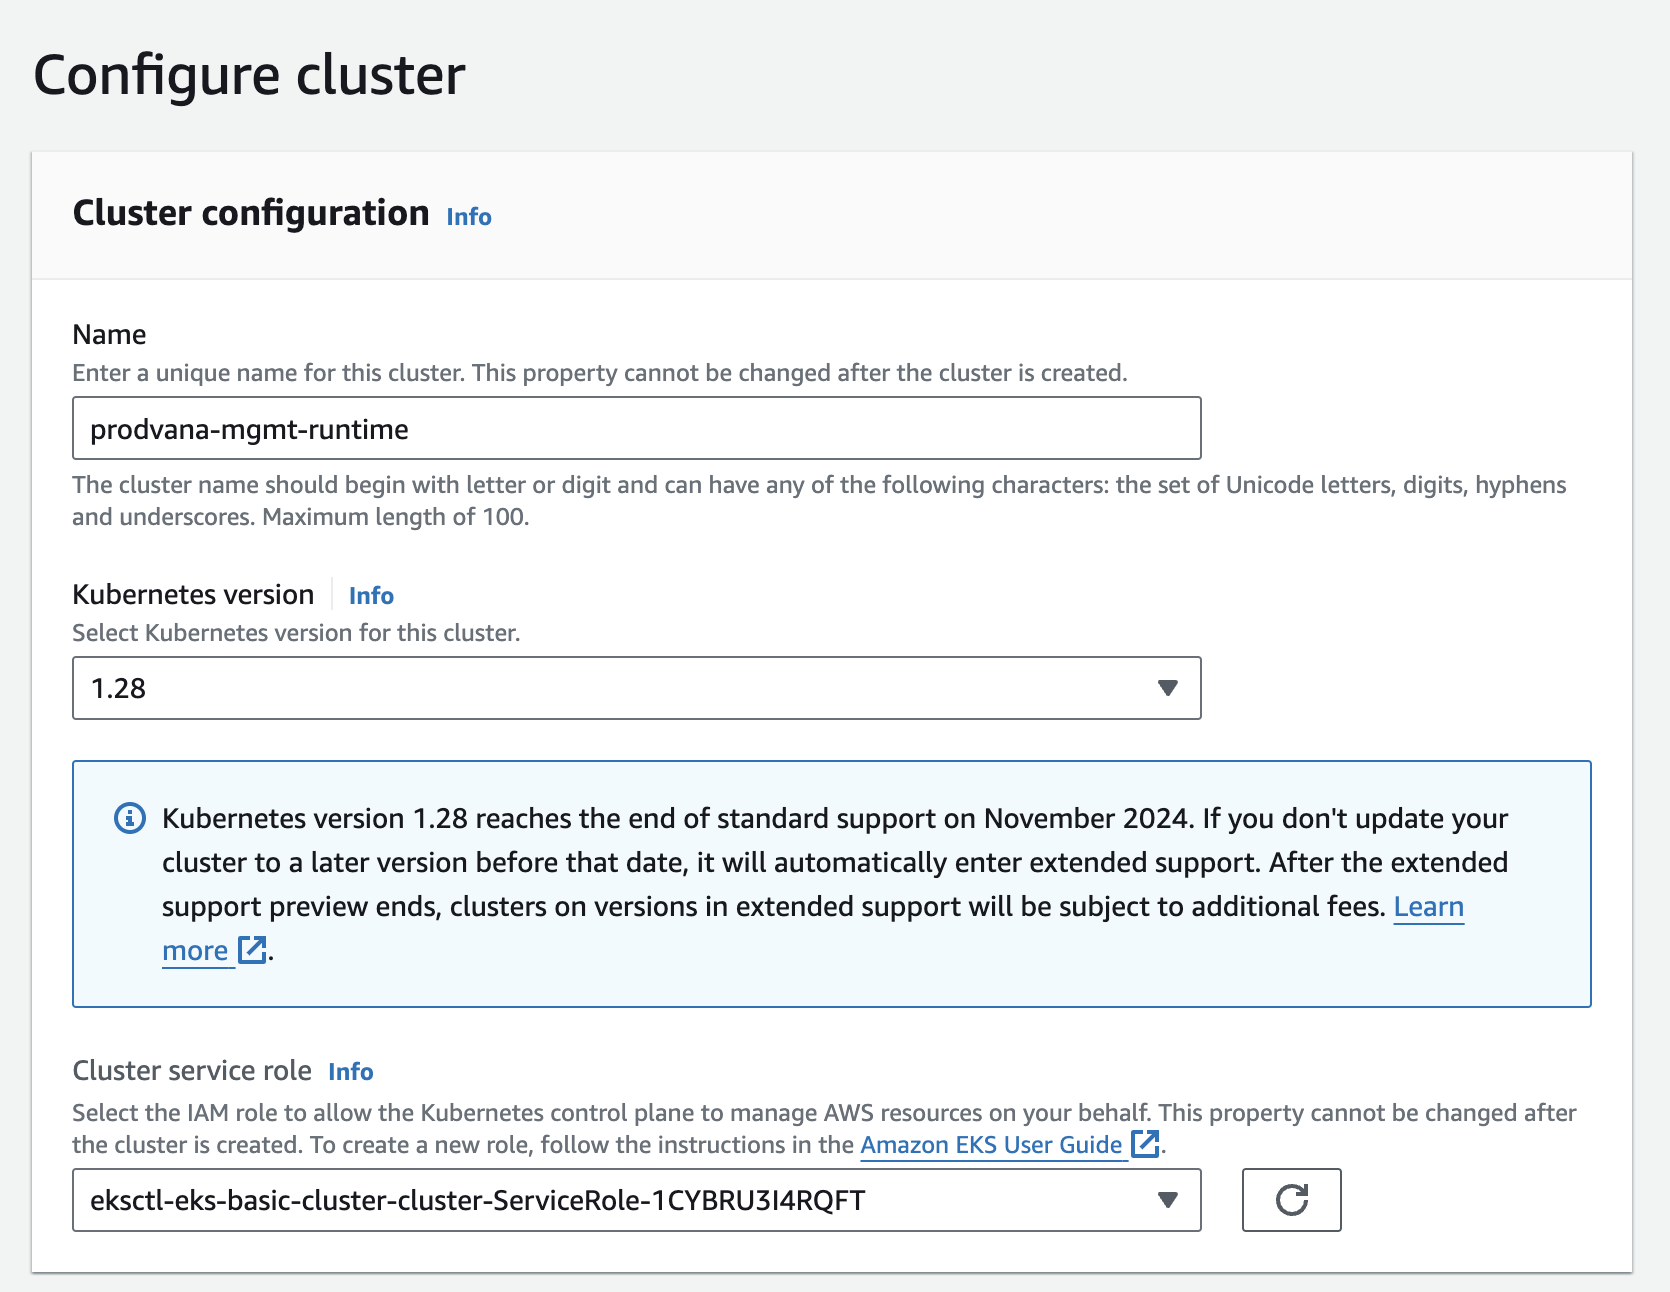
- Under Cluster configuration
- Give the cluster a name, like “prodvana-mgmt-runtime” or similar.
- Keep the default selected Kubernetes version.
- For Cluster service role select the role you created in Create IAM roles needed by the EKS Cluster
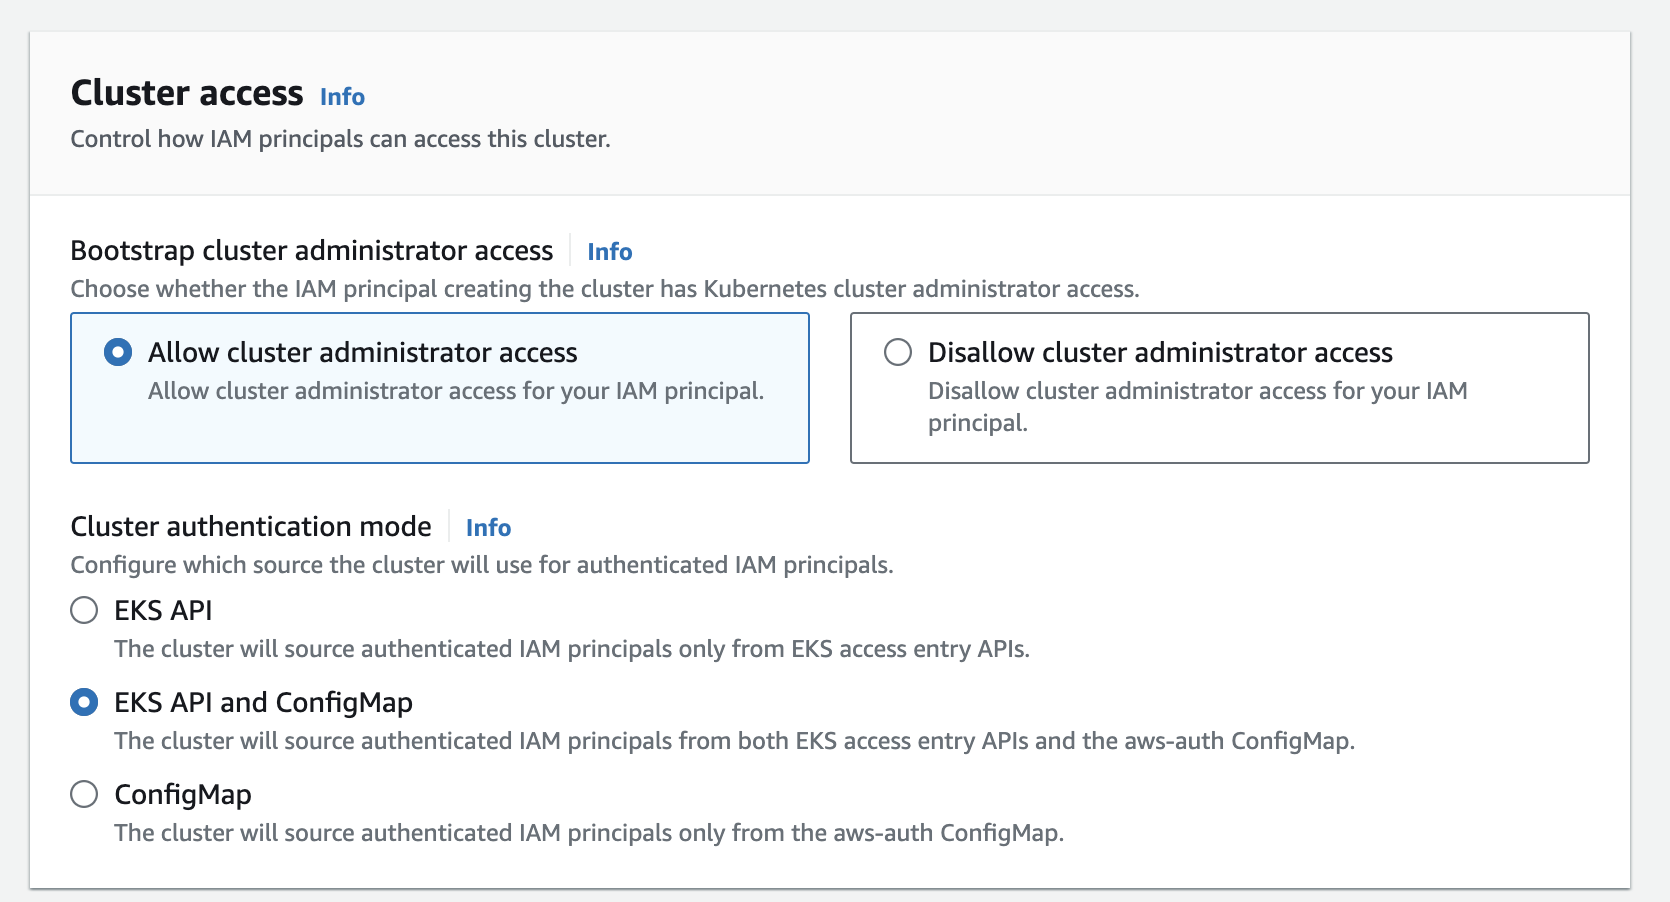
- Under Cluster access keep the defaults:
- Bootstrap cluster administrator access = Allow cluster administrator access
- Cluster authentication mode = EKS API and ConfigMap
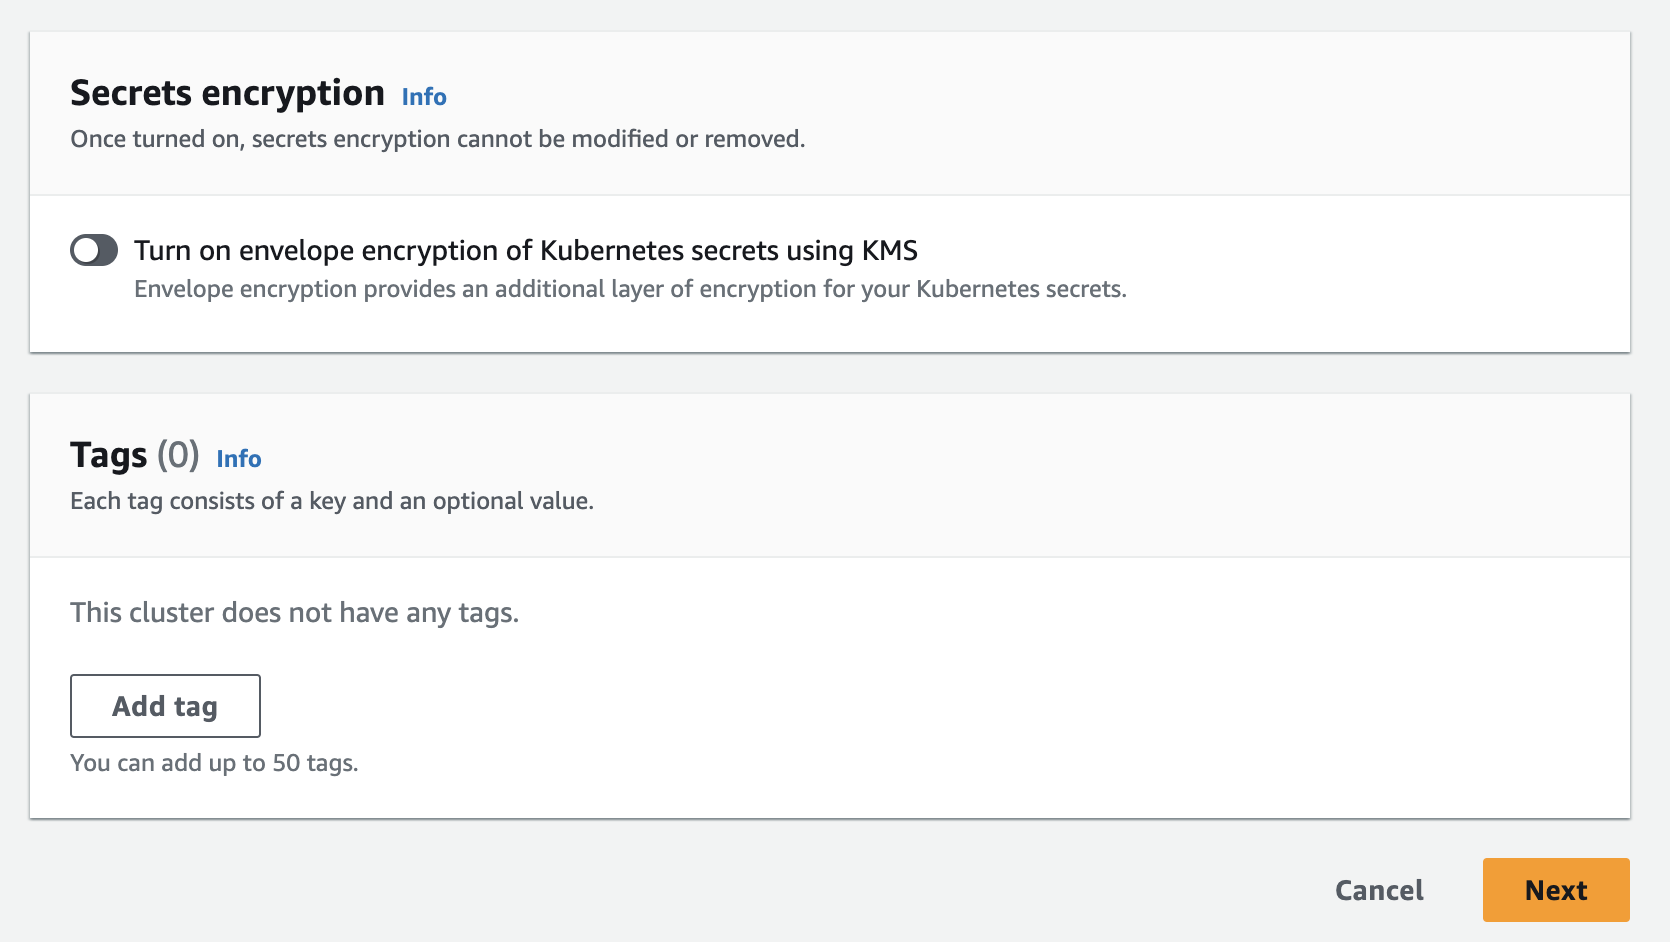
- Under Secrets encryption keep the defaults:
- Turn on envelope encryption of Kubernetes secrets using KMS = off
- Click Next
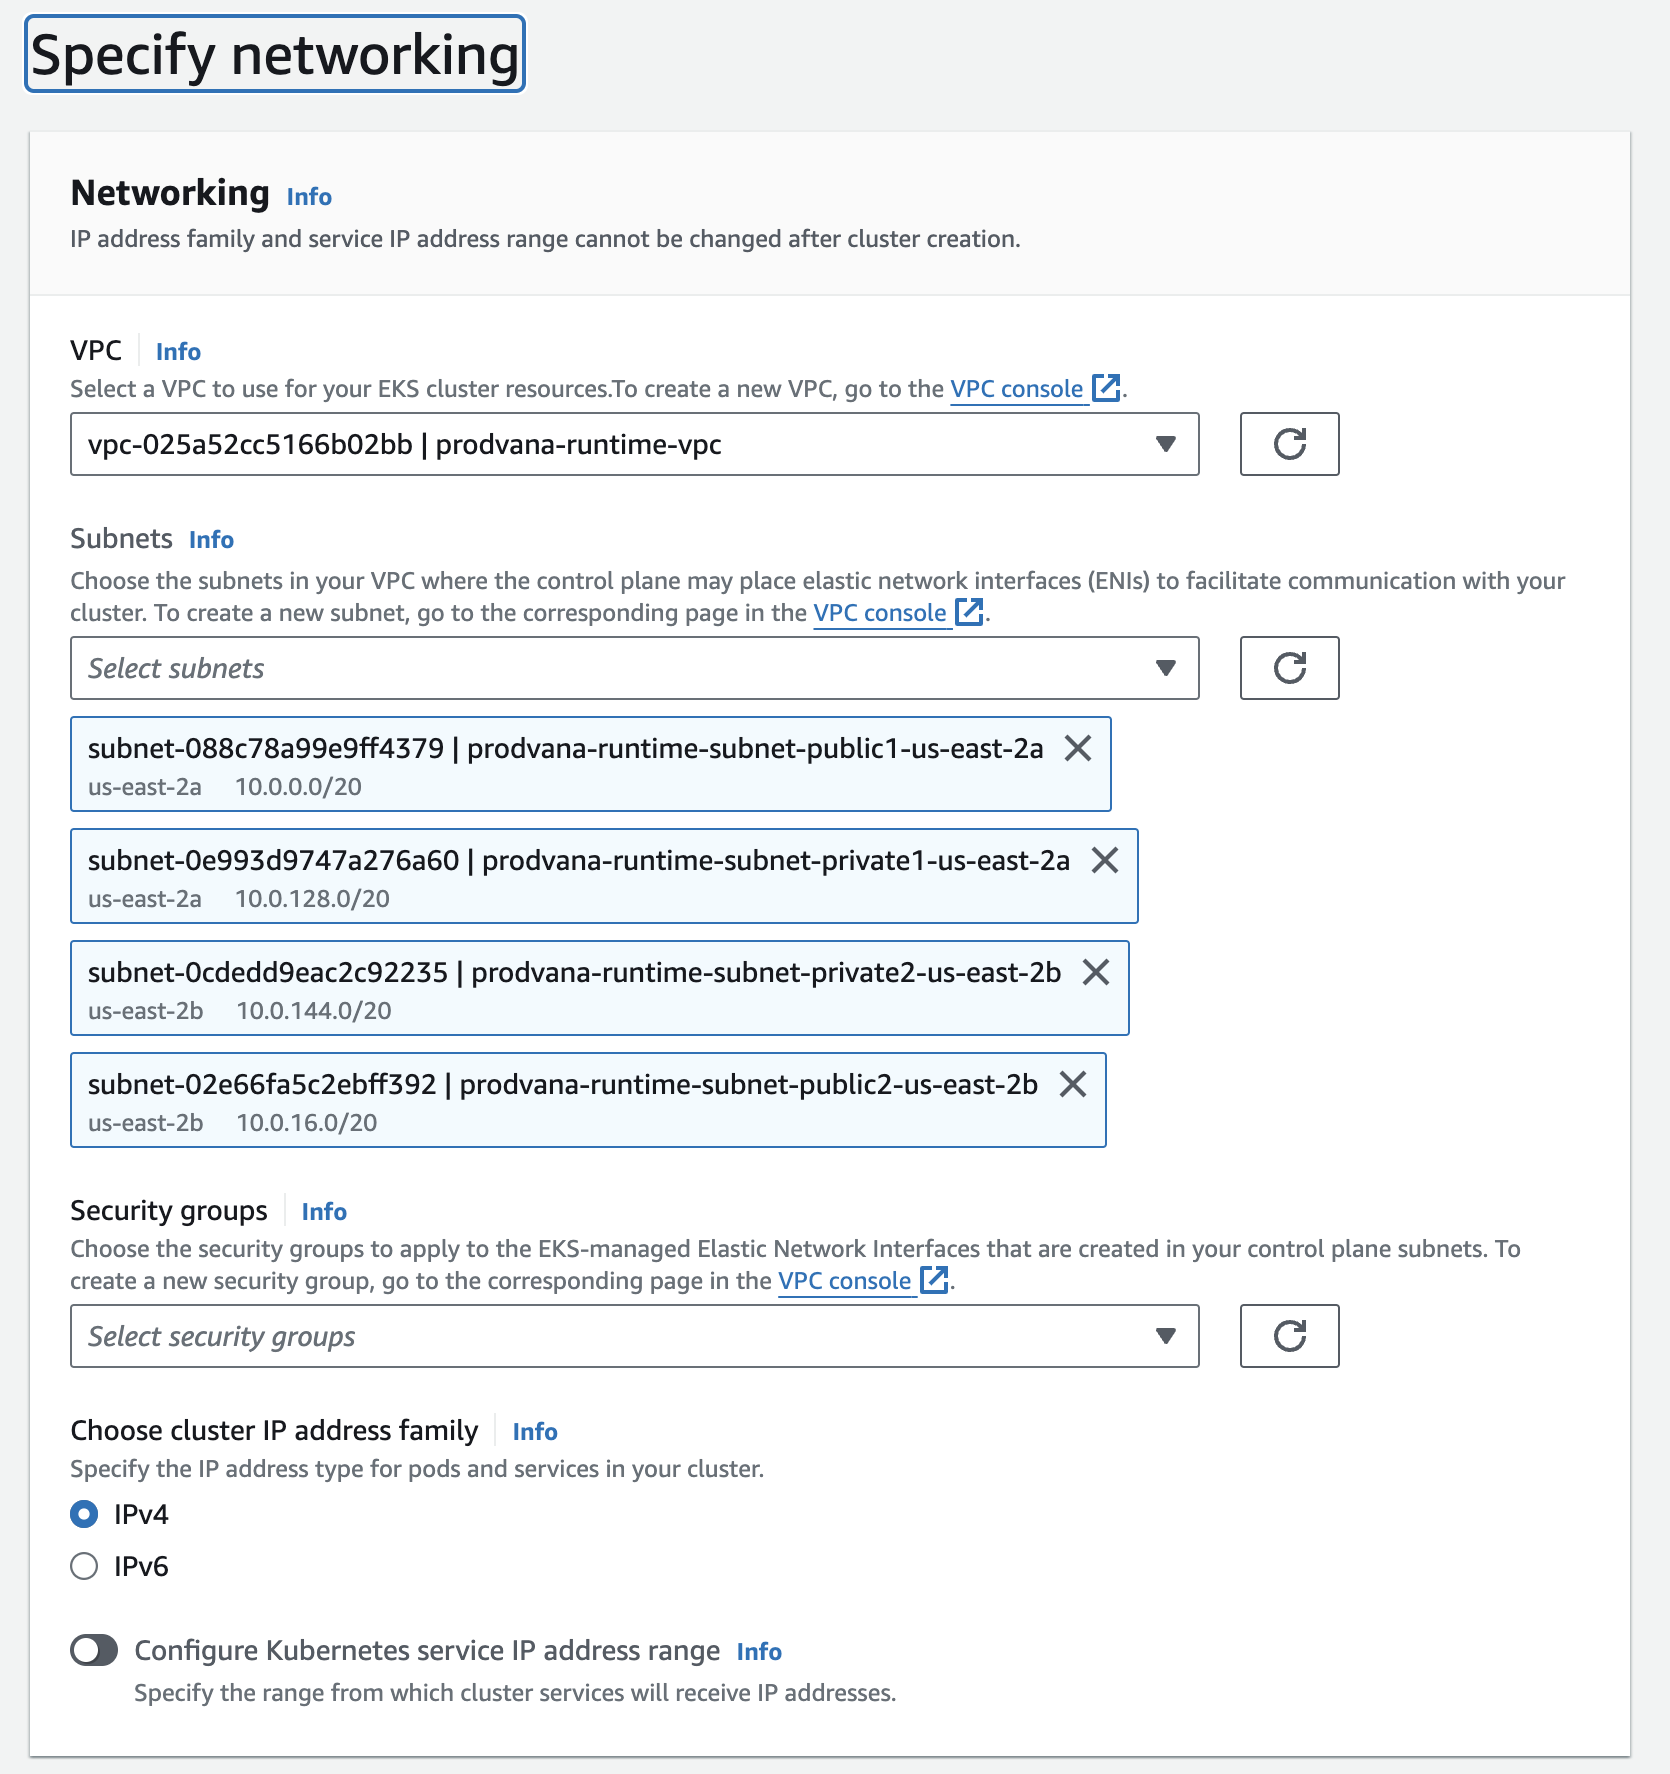
- Under Networking:
- for VPC select the VPC you created in Create a VPC for the EKS Cluster
- The VPC’s subnets should be automatically selected, ensure you see 4 subnets.
- Keep Security groups empty
- Keep Choose cluster IP address family set to IPv4
- Keep Configure Kubernetes service IP address range set to off
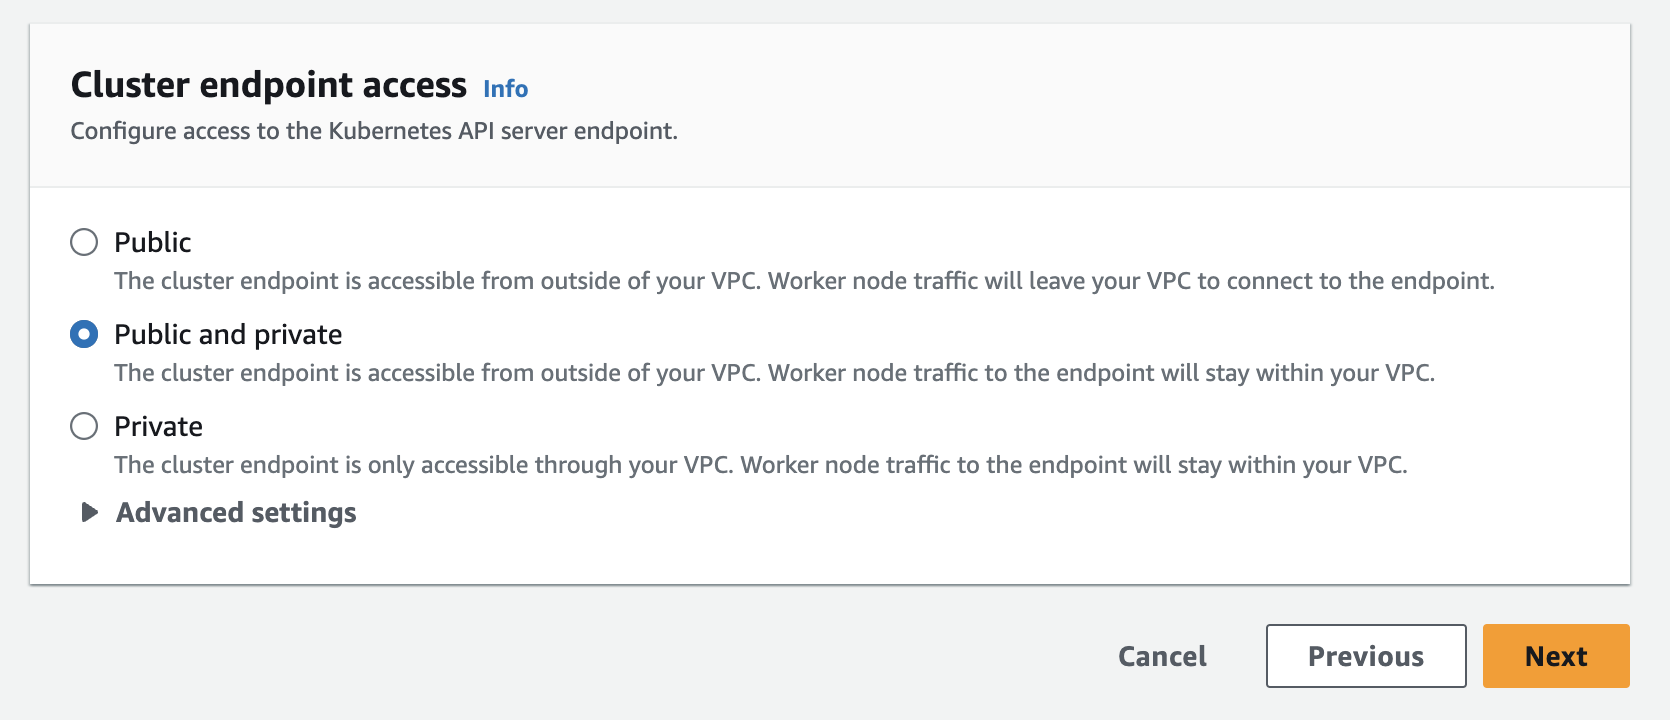
- Under Cluster endpoint access
- Keep the default Public and private option selected
- Click Next
- Under Configure observability you can leave the default options (all optional observability disabled).
- Click Next
- Under Select add-ons ensure the following default add-ons are enabled:
- Amazon VPC CNI
- CoreDNS
- kube-proxy
- Amazon EKS Pod Identity Agent
- Click Next
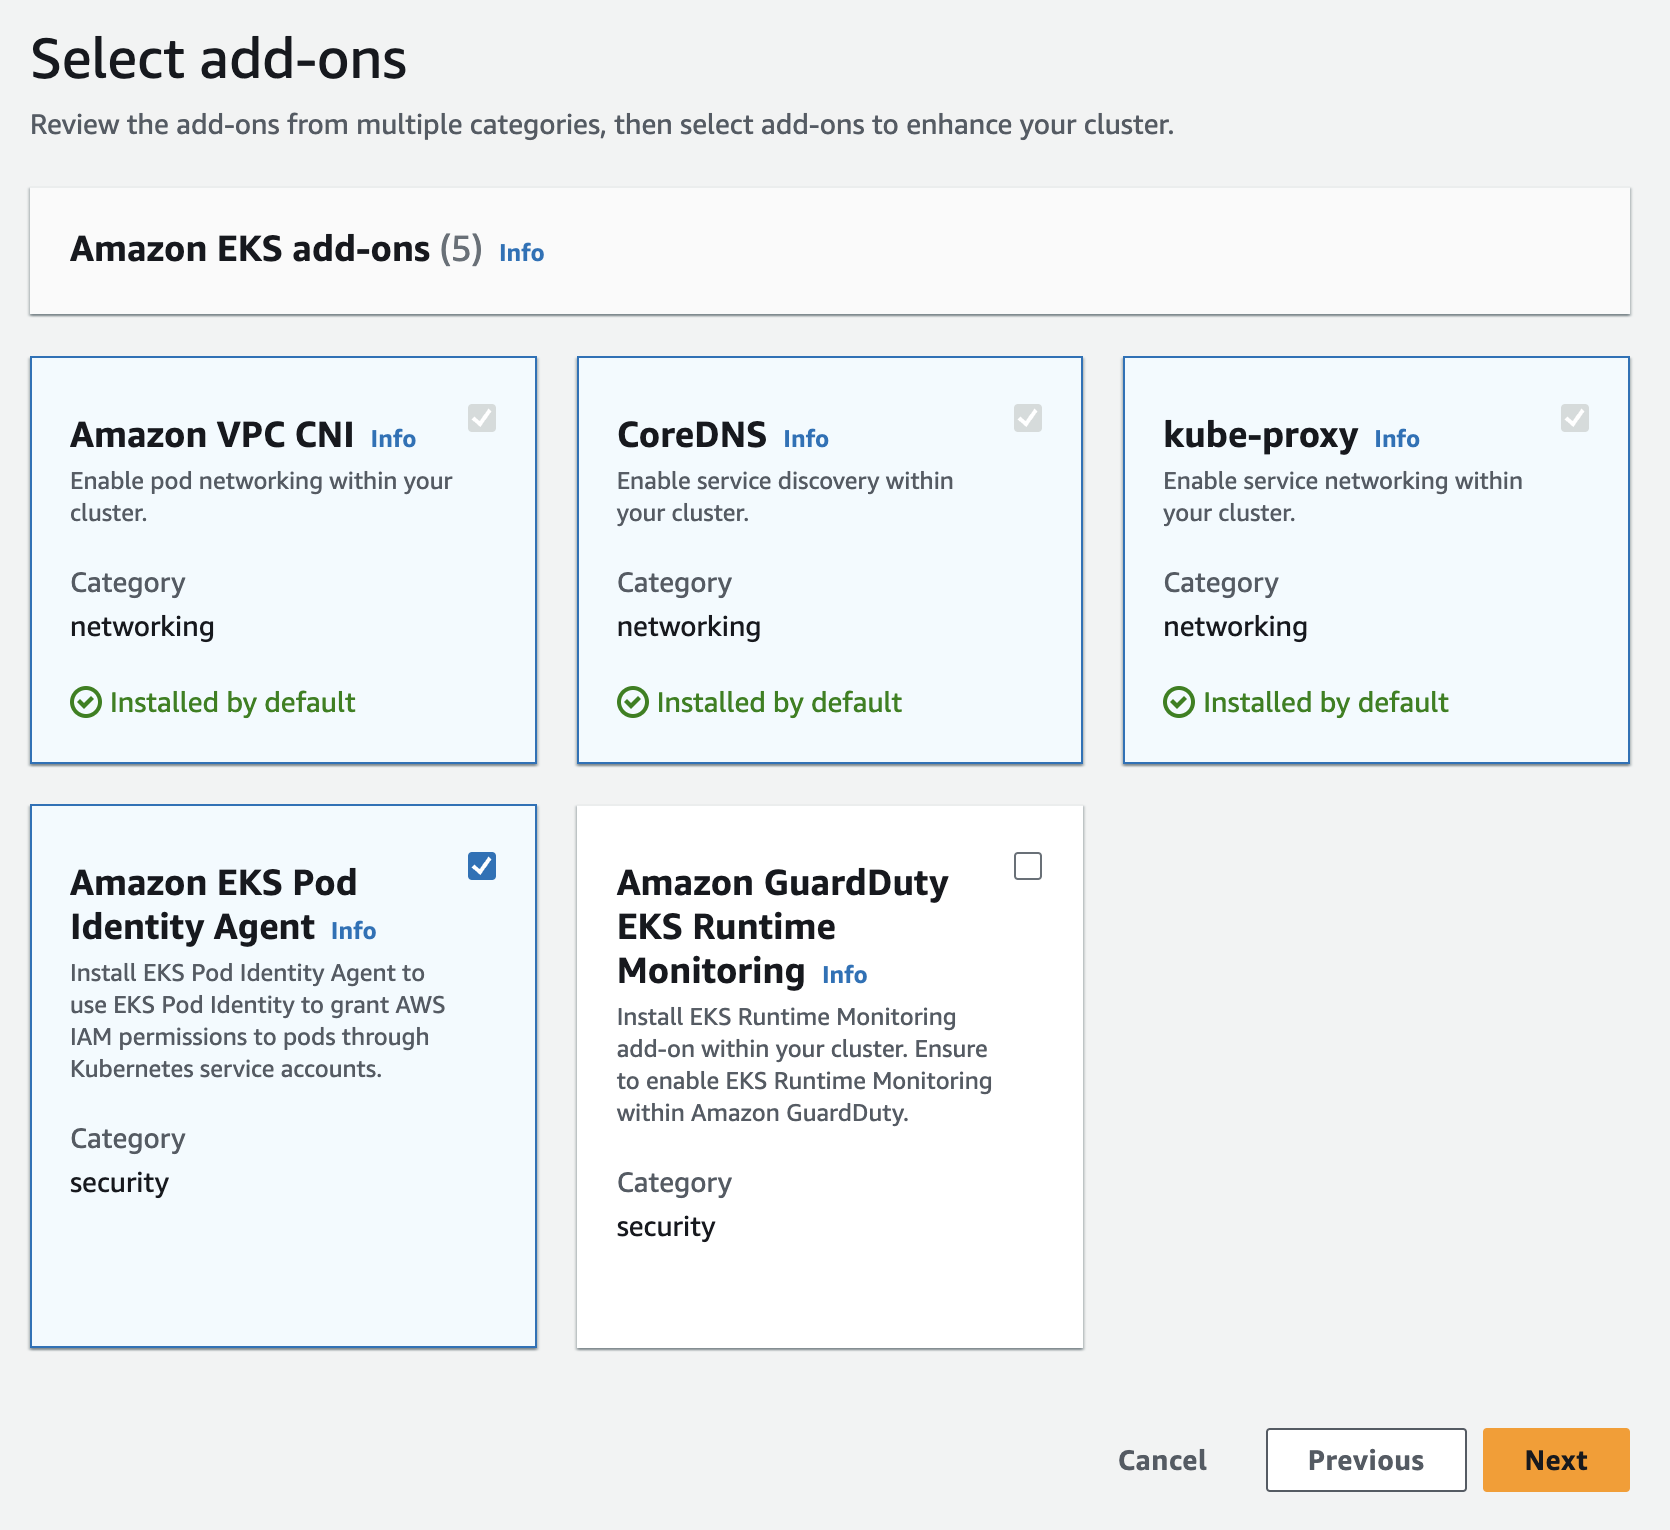
- Under Configure selected add-ons settings leave all the default versions set for the add-ons.
- Click Next
- You should now be on the Review and create step. Double check the options on this page match the options we set above, then click Create.
- You will now be redirected to the AWS Console page for your new EKS cluster.
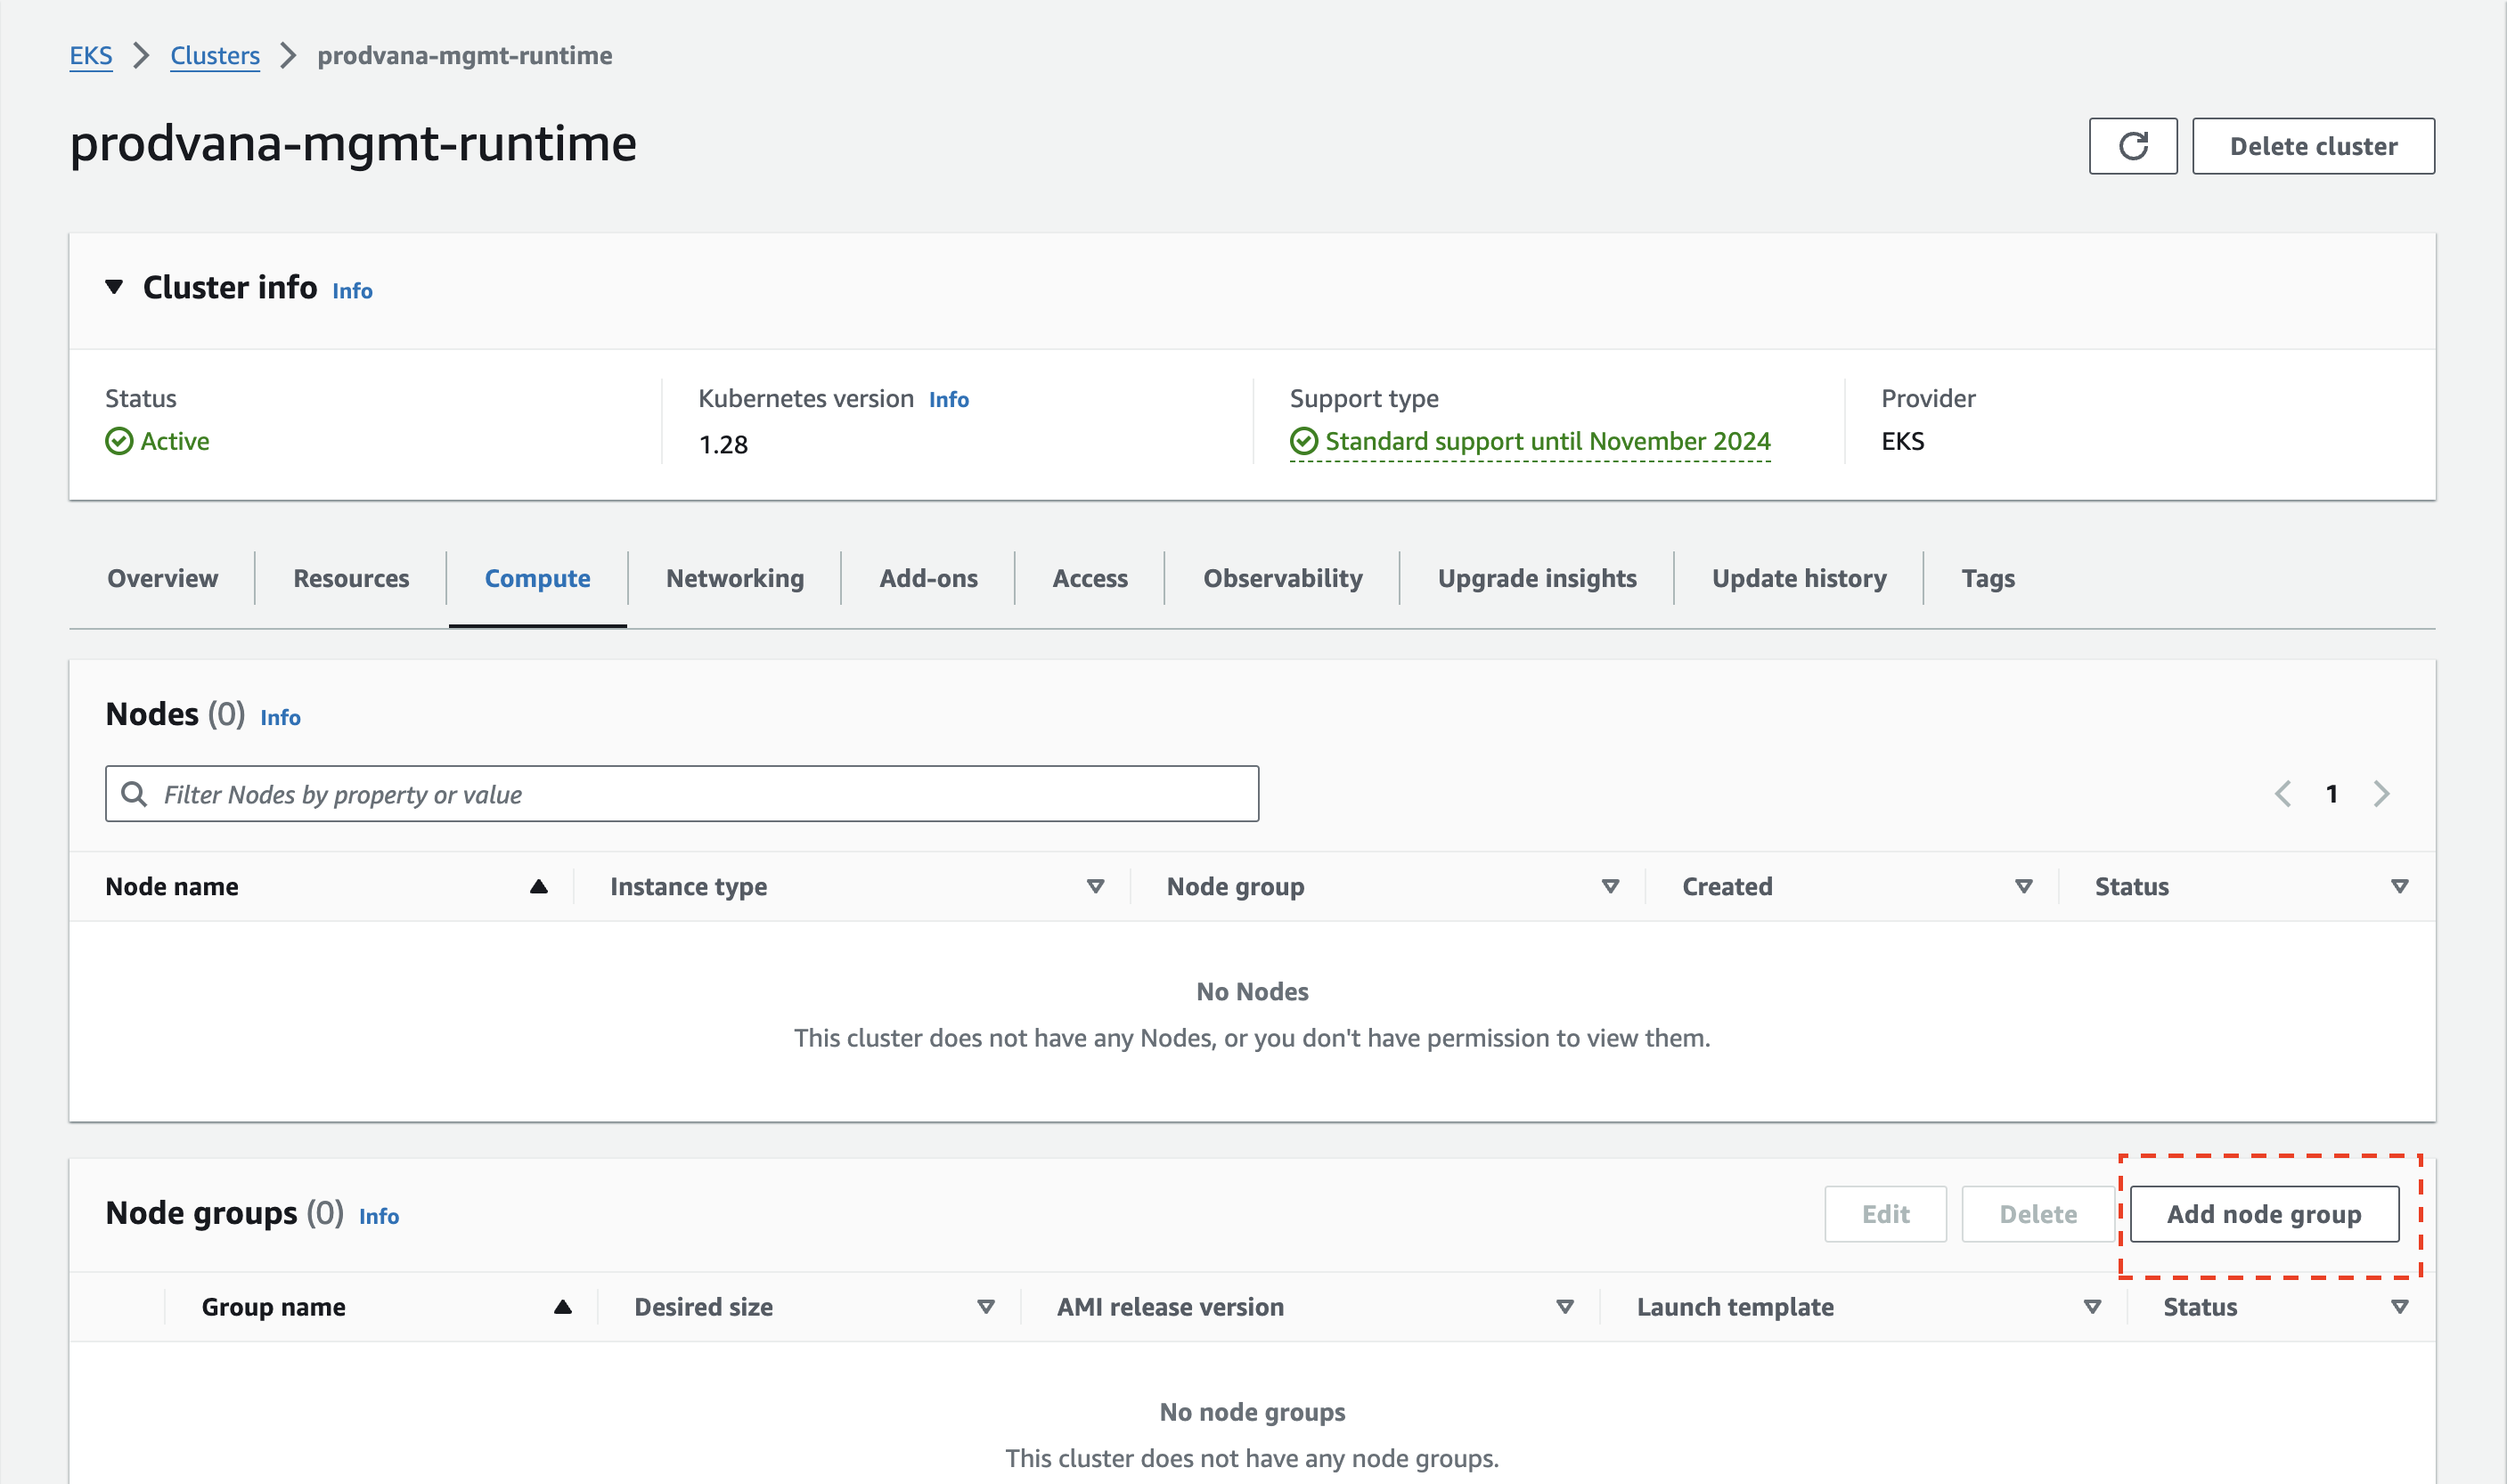
Create a Node Group for the EKS Cluster
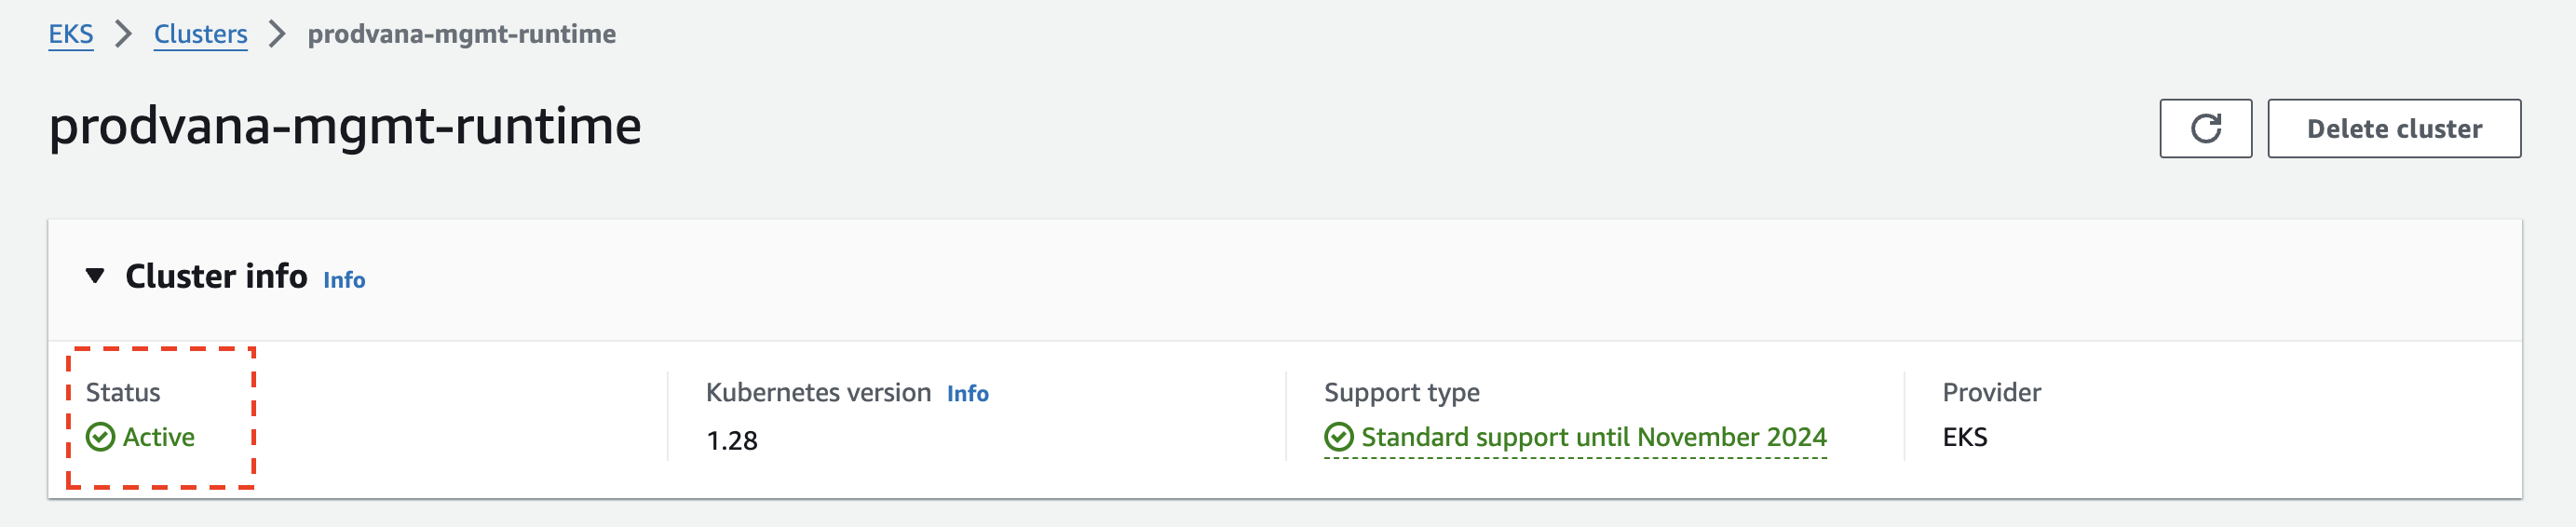
It can take 5-10 minutes for AWS to finish creating the cluster. Make sure to wait until the Cluster Status changes to “Active” before continuing.
- From the EKS Cluster’s console page, go to the Compute tab, and click the Add node group button
- Under Node group configuration
- Set the Name to “primary”
- For Node IAM role select the IAM role you created in Create IAM roles needed by the EKS Cluster
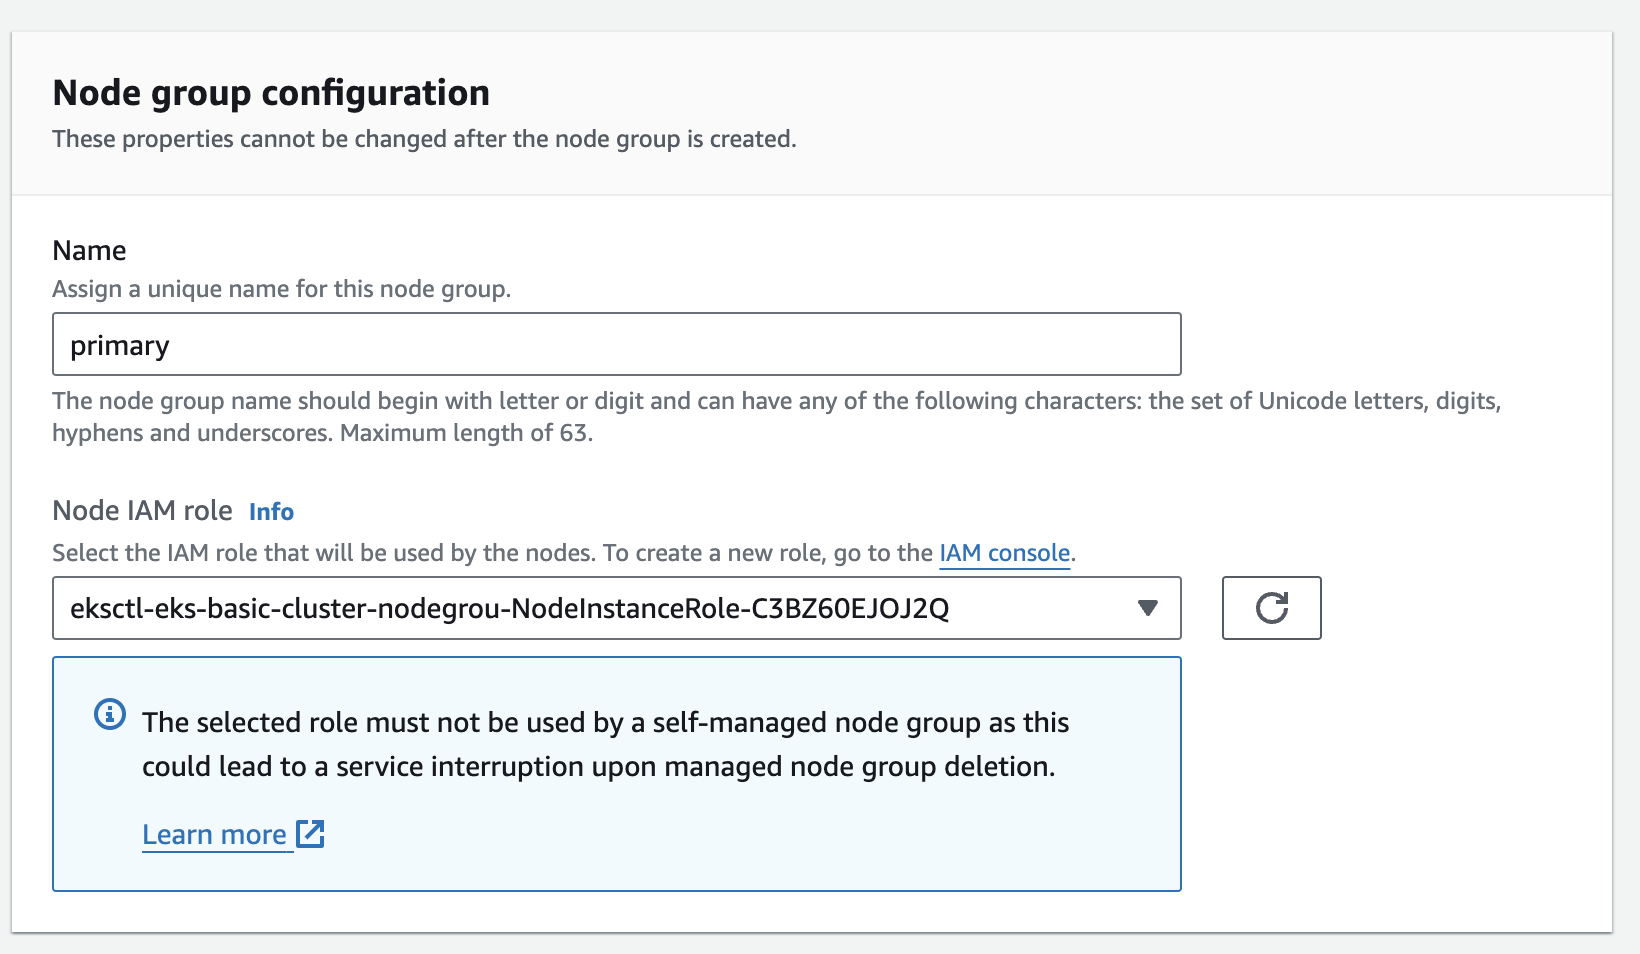
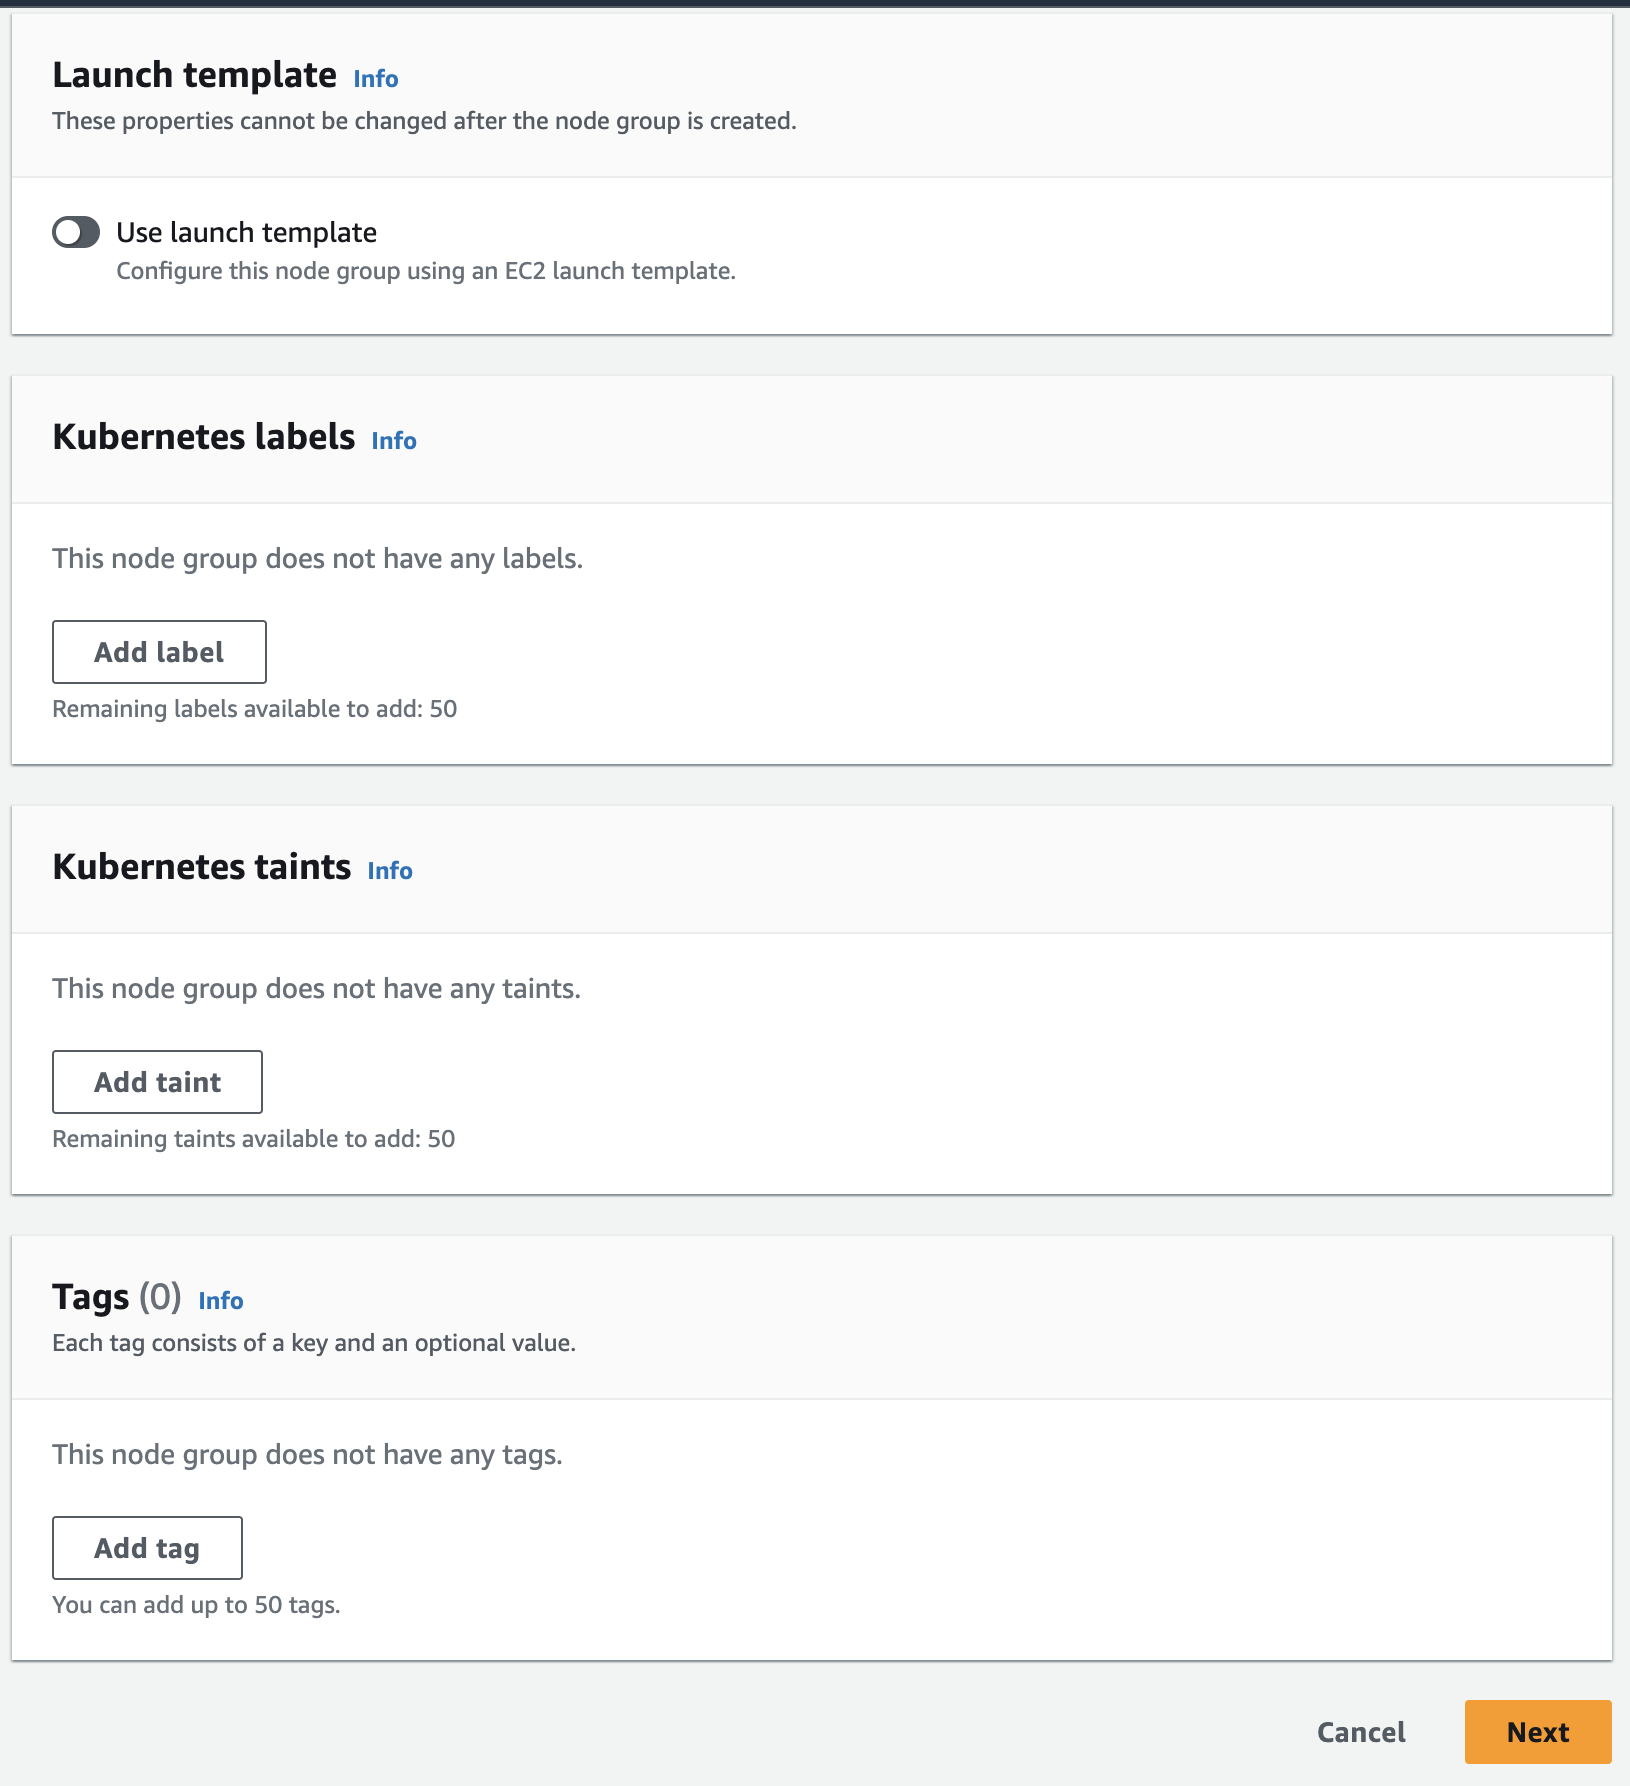
- Keep the defaults for all remaining sections on this page and click Next
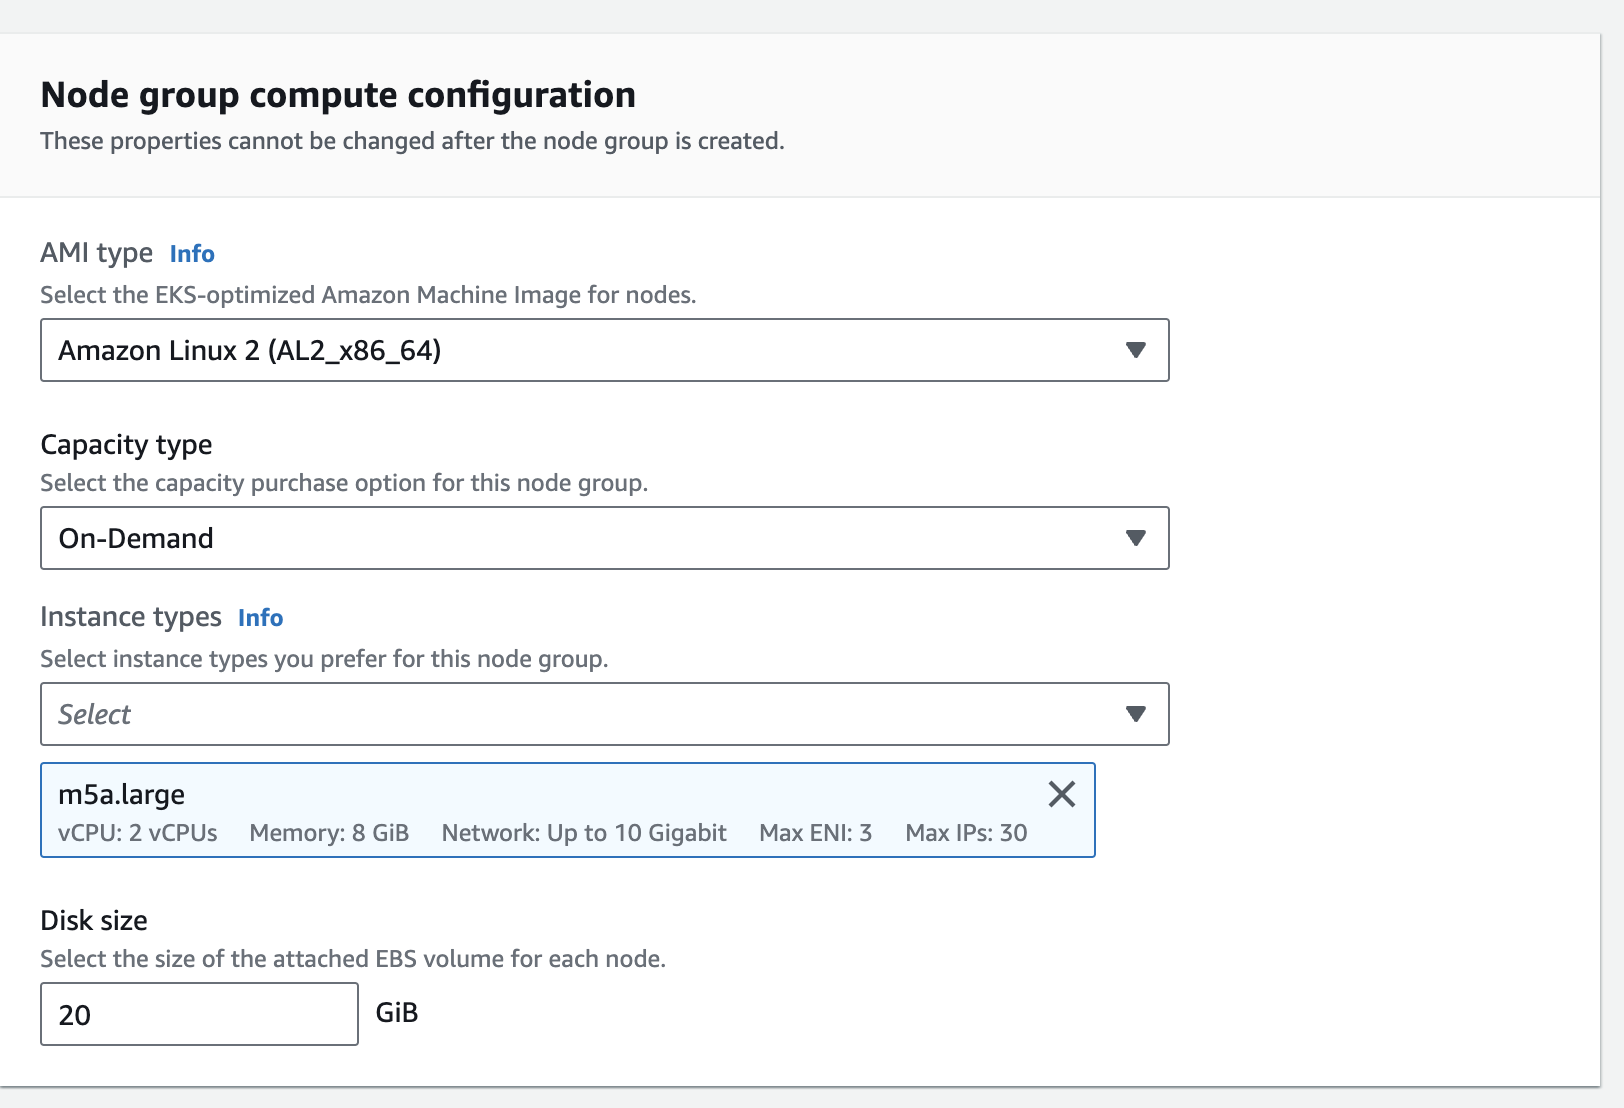
- Under Node group compute configuration:
- Keep AMI type on the default Amazon Linux 2
- Keep Capacity type set to On-Demand
- For Instance types search for
m5a.largeand select it. - Keep Disk size set to the default of 20 GiB
- Under Node group scaling configuration keep Desired size, Minimum size, and Maximum size set to the default 2
- Under Node group update configuration keep the default Number option selected and set the Value to 1
- Click Next

- Under Node group update configuration you should see a list of all 4 subnets of the VPC you created in Create a VPC for the EKS Cluster
- Click Next
- You will now be on the Review and create page. Double check the values match what we just configured and click Create.
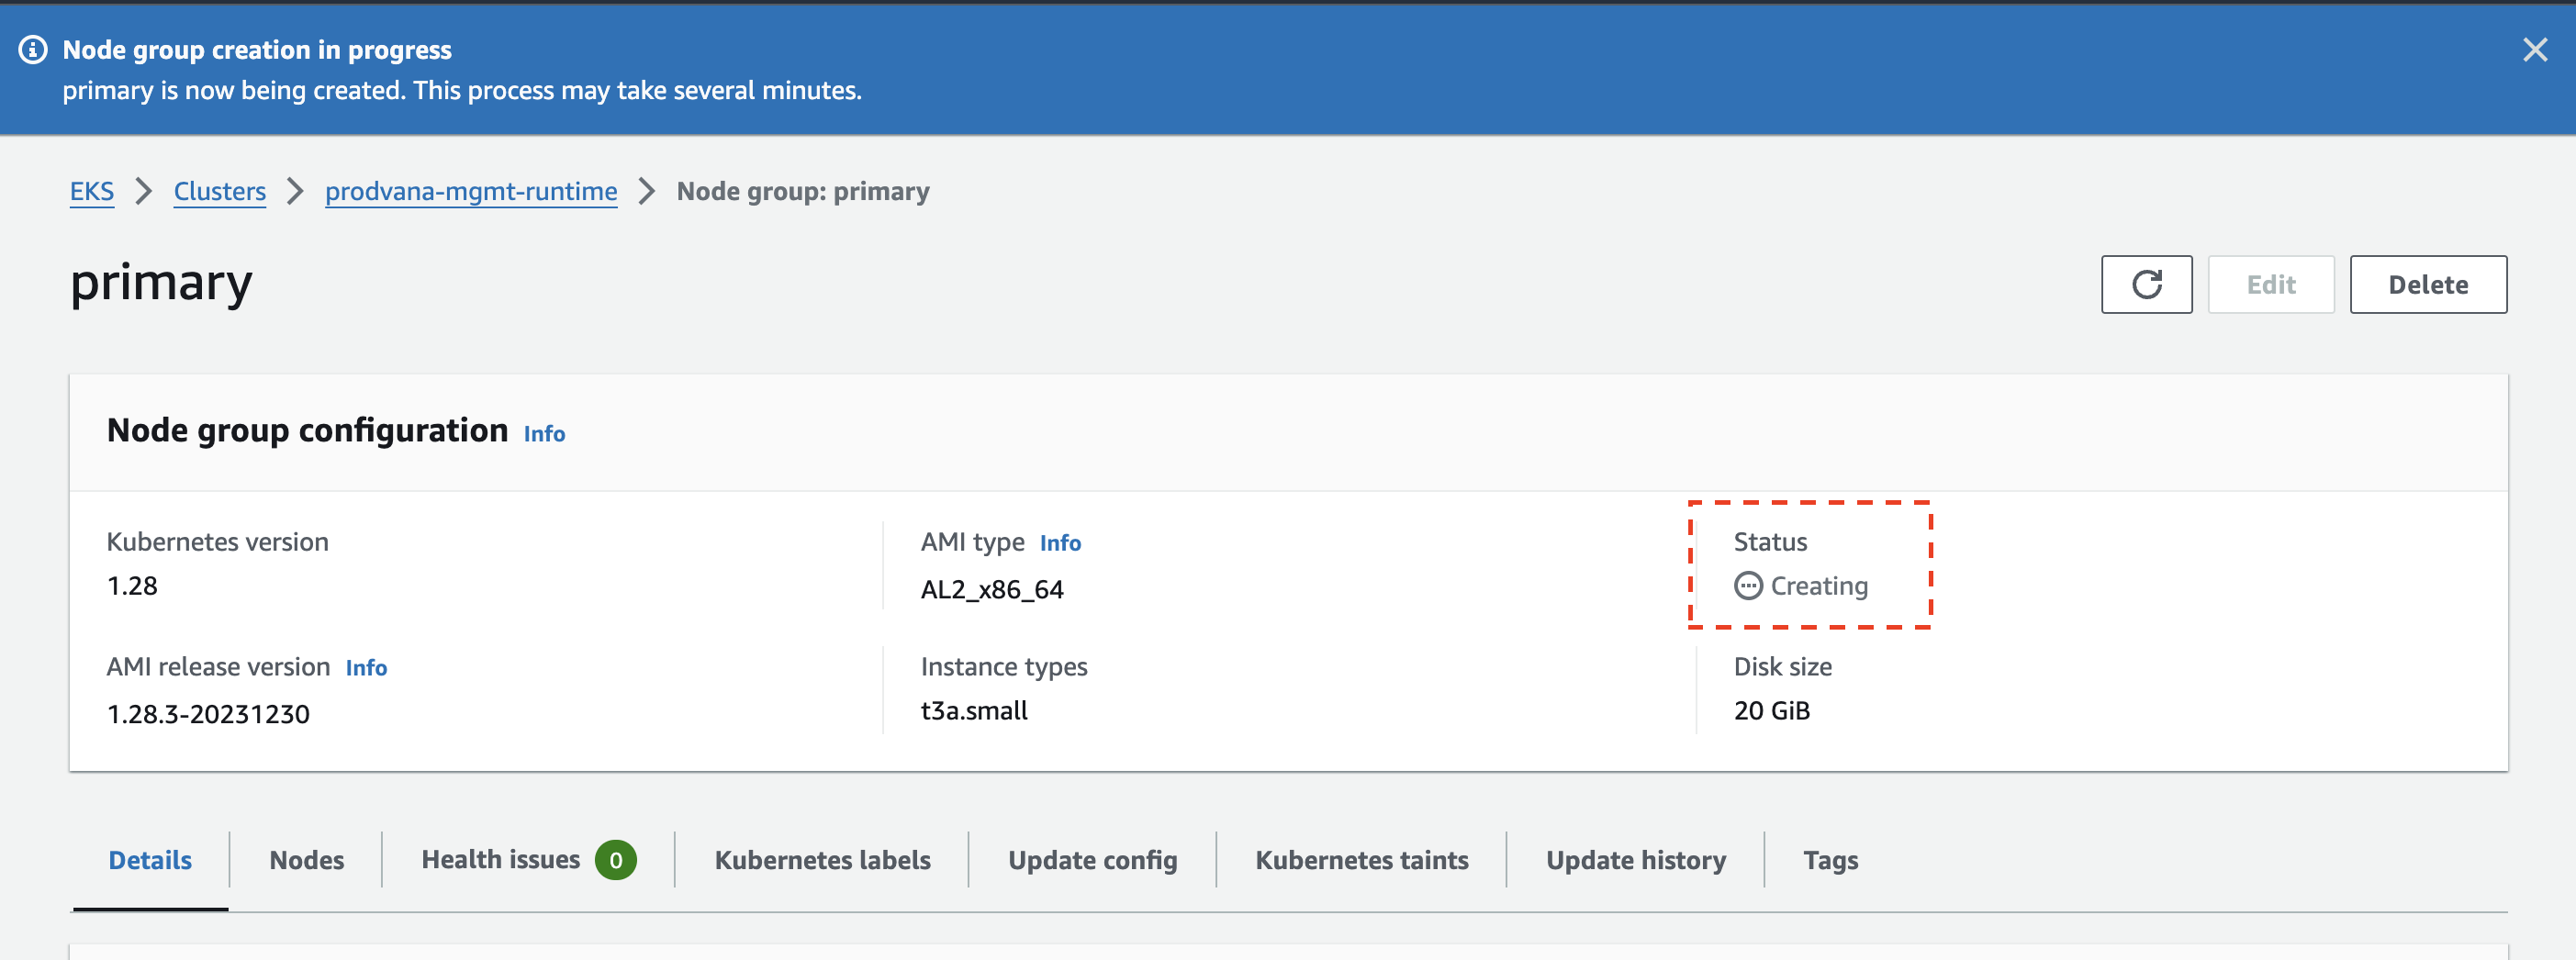
- You will be redirected to the Node Group’s console page. Wait until the Node Group’s Status changes from Creating to Active before moving on.
Validate the cluster
You should now have an EKS cluster that is configured and ready to be used by Prodvana. We will now run a validation tool to ensure the cluster is configured correctly.
- Open a terminal emulator on a computer where you have the
awsandkubectlcommand line tools installed. - Make sure you have run
aws configureand authenticated with the same user you used in the Web Console to create the cluster. - Run the following command with the region and cluster name you used when creating the cluster.
aws eks update-kubeconfig --region <region-code> --name <cluster-name>
- Run
pvnctl preflight k8s(more information here: pvnctl preflight)- follow the prompts, and make sure to select the EKS cluster we just created from the list.
- This will run a series of checks to make sure you will be able to successfully deploy the Prodvana Agent to your new cluster.
Updated over 1 year ago