
Okta
This guide will walk you through creating an Application Integration in Okta to connect to Prodvana.
Requirements
- Admin Access to your Okta account
Setup
- Go to your Okta admin dashboard. On the left-hand side, expand "Applications" and click "Applications".
- Click "Create App Integration"

- From the modal, select "OIDC - OpenID Connect" for the sign-in method, and select, "Web Application" for the Application type.

- Enter "Prodvana" for the App integration name, and replace the Sign-in redirect URI with
https://prodvana.us.auth0.com/login/callback.

- If you know the group(s) you would like to assign access to Prodvana, you can configure that now; if not just select the "Skip group assignment for now" option and Click "Save".

- Make note of the following three values; Client ID, Client Secret, and Okta domain. Ee will need them during onboarding to configure authentication. Client ID and Client Secret can be found on your newly created App integration page:

Your Okta domain can be found in the top right hand corner dropdown menu:

Optional: Setting User Roles from Okta
To automatically configure user roles from Okta, do the following:
- Use the Profile Editor, click on "User (default)".
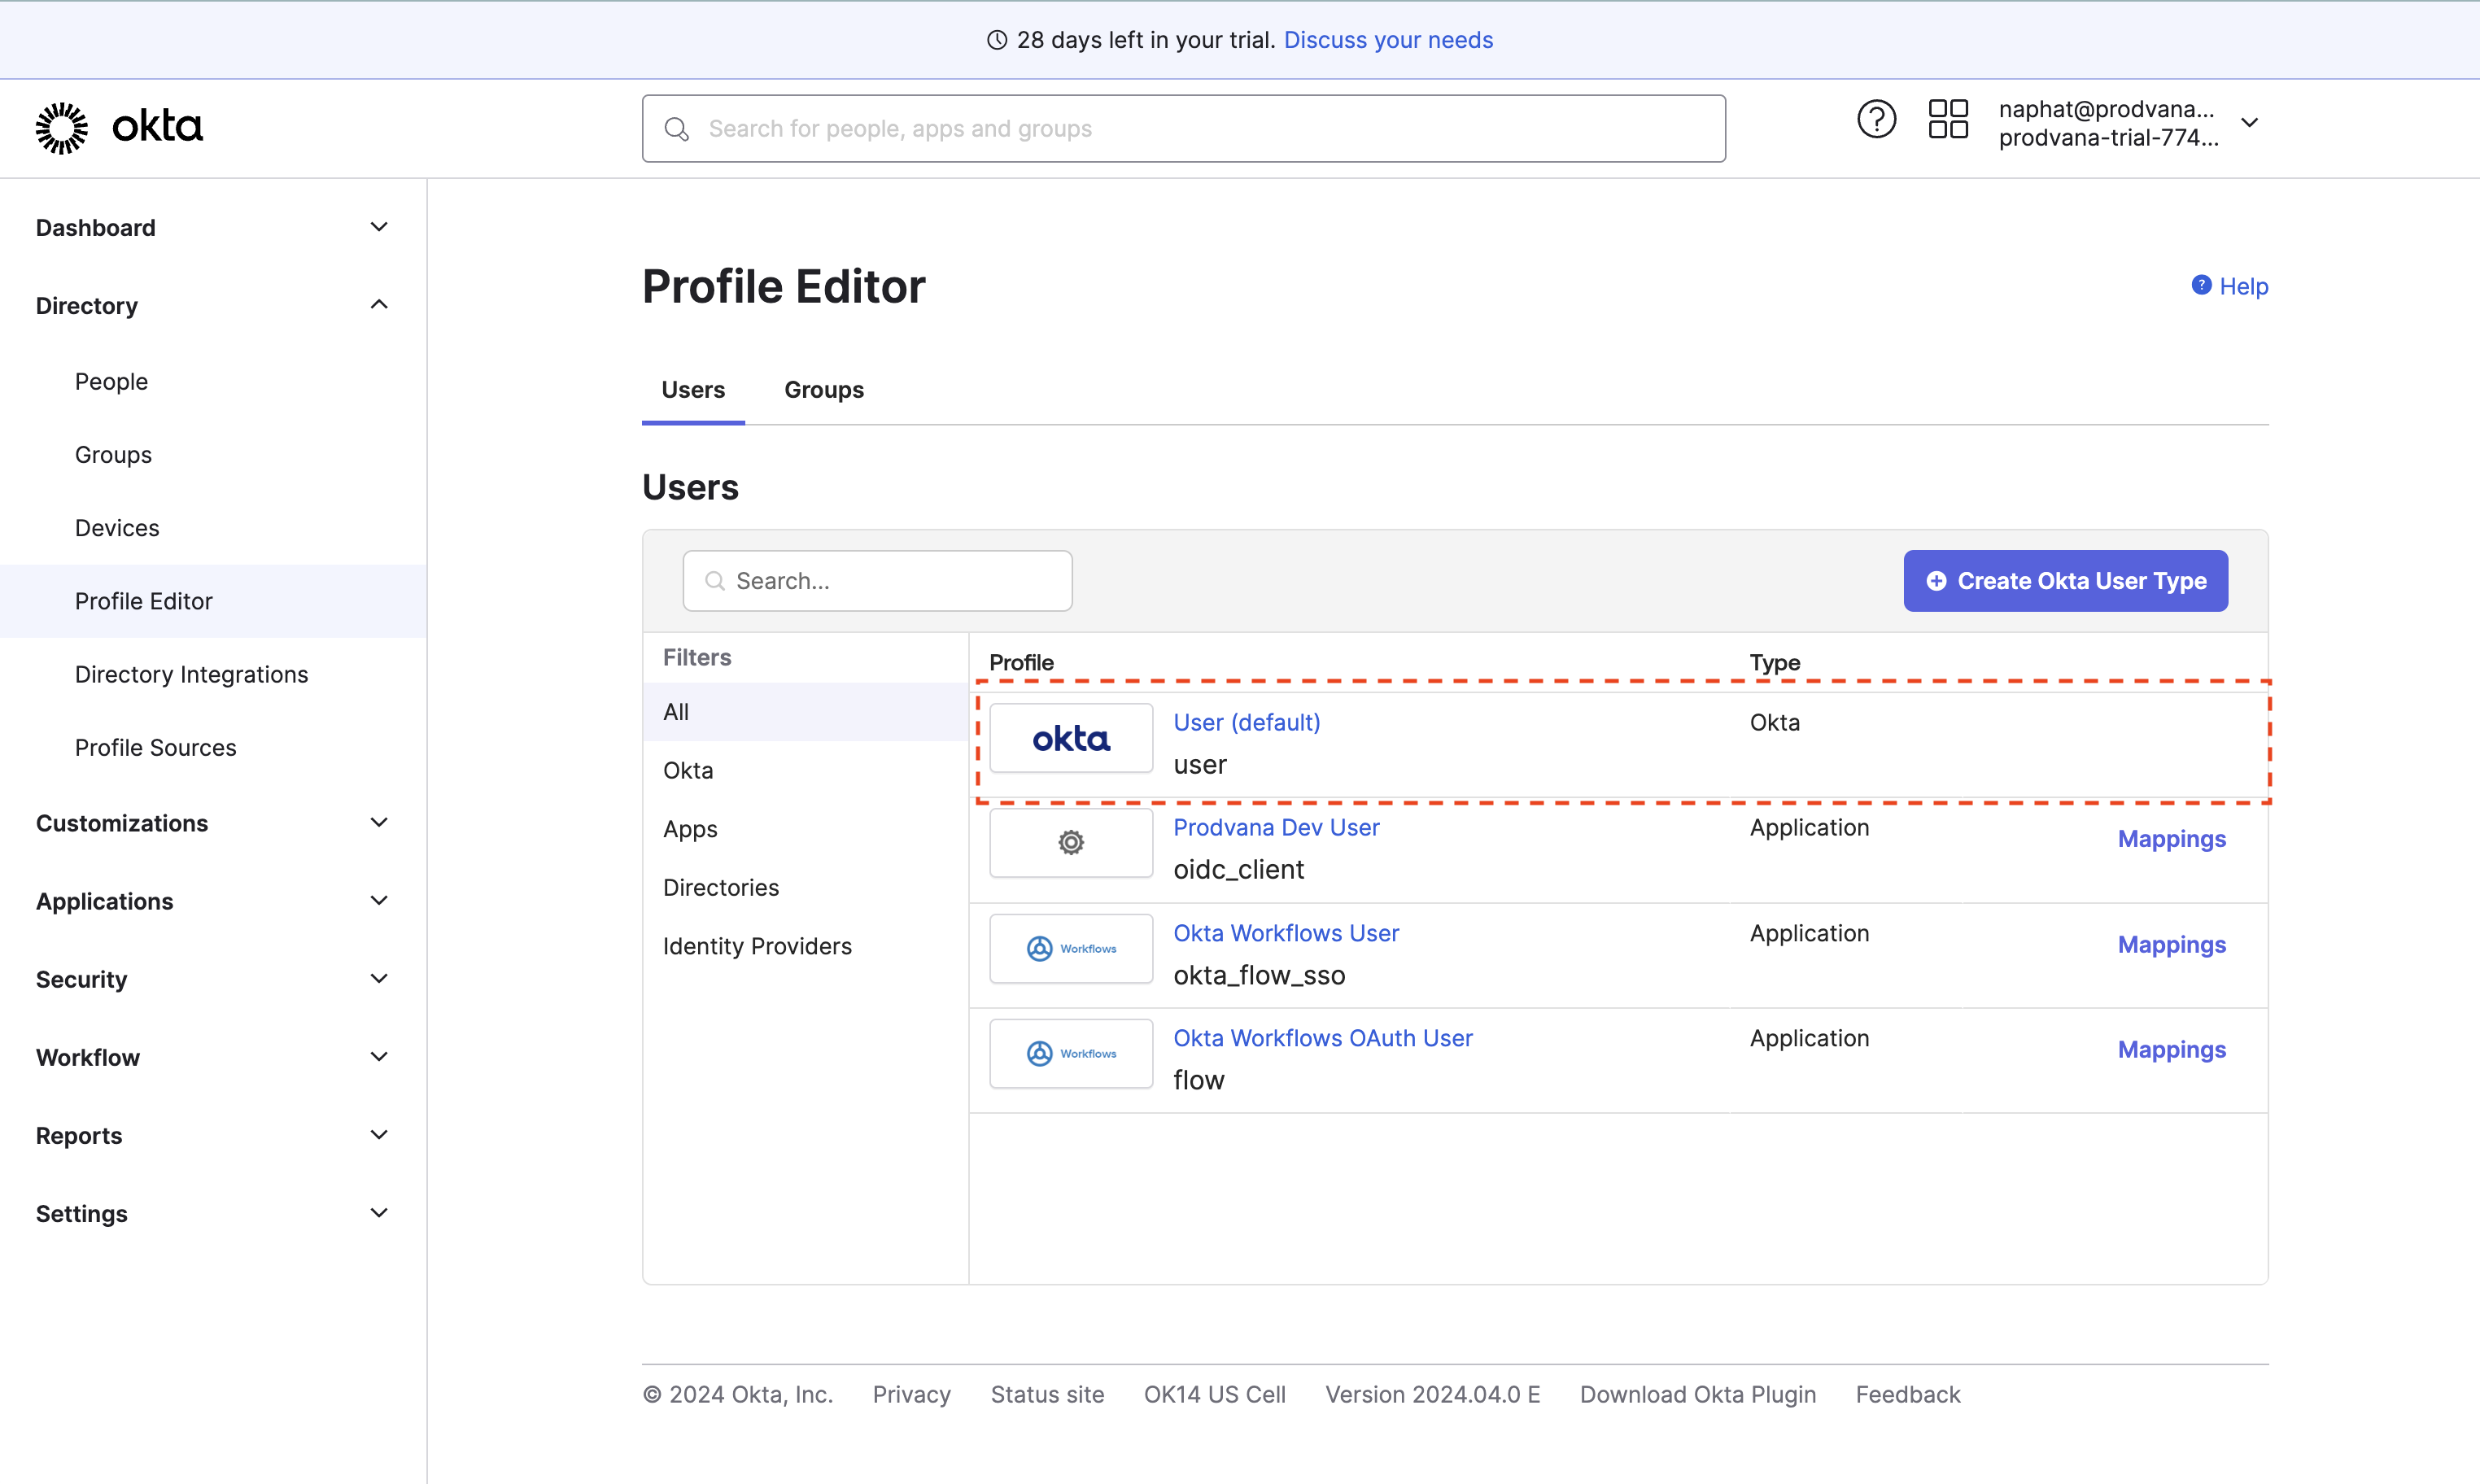
- Click on "Add Attribute". Data type should be an array, the variable name should be "prodvana_role", and create an enum of all the roles. Click Save.

- Go back to the Profile Editor, click on the oidc_client for the Application you just created earlier.
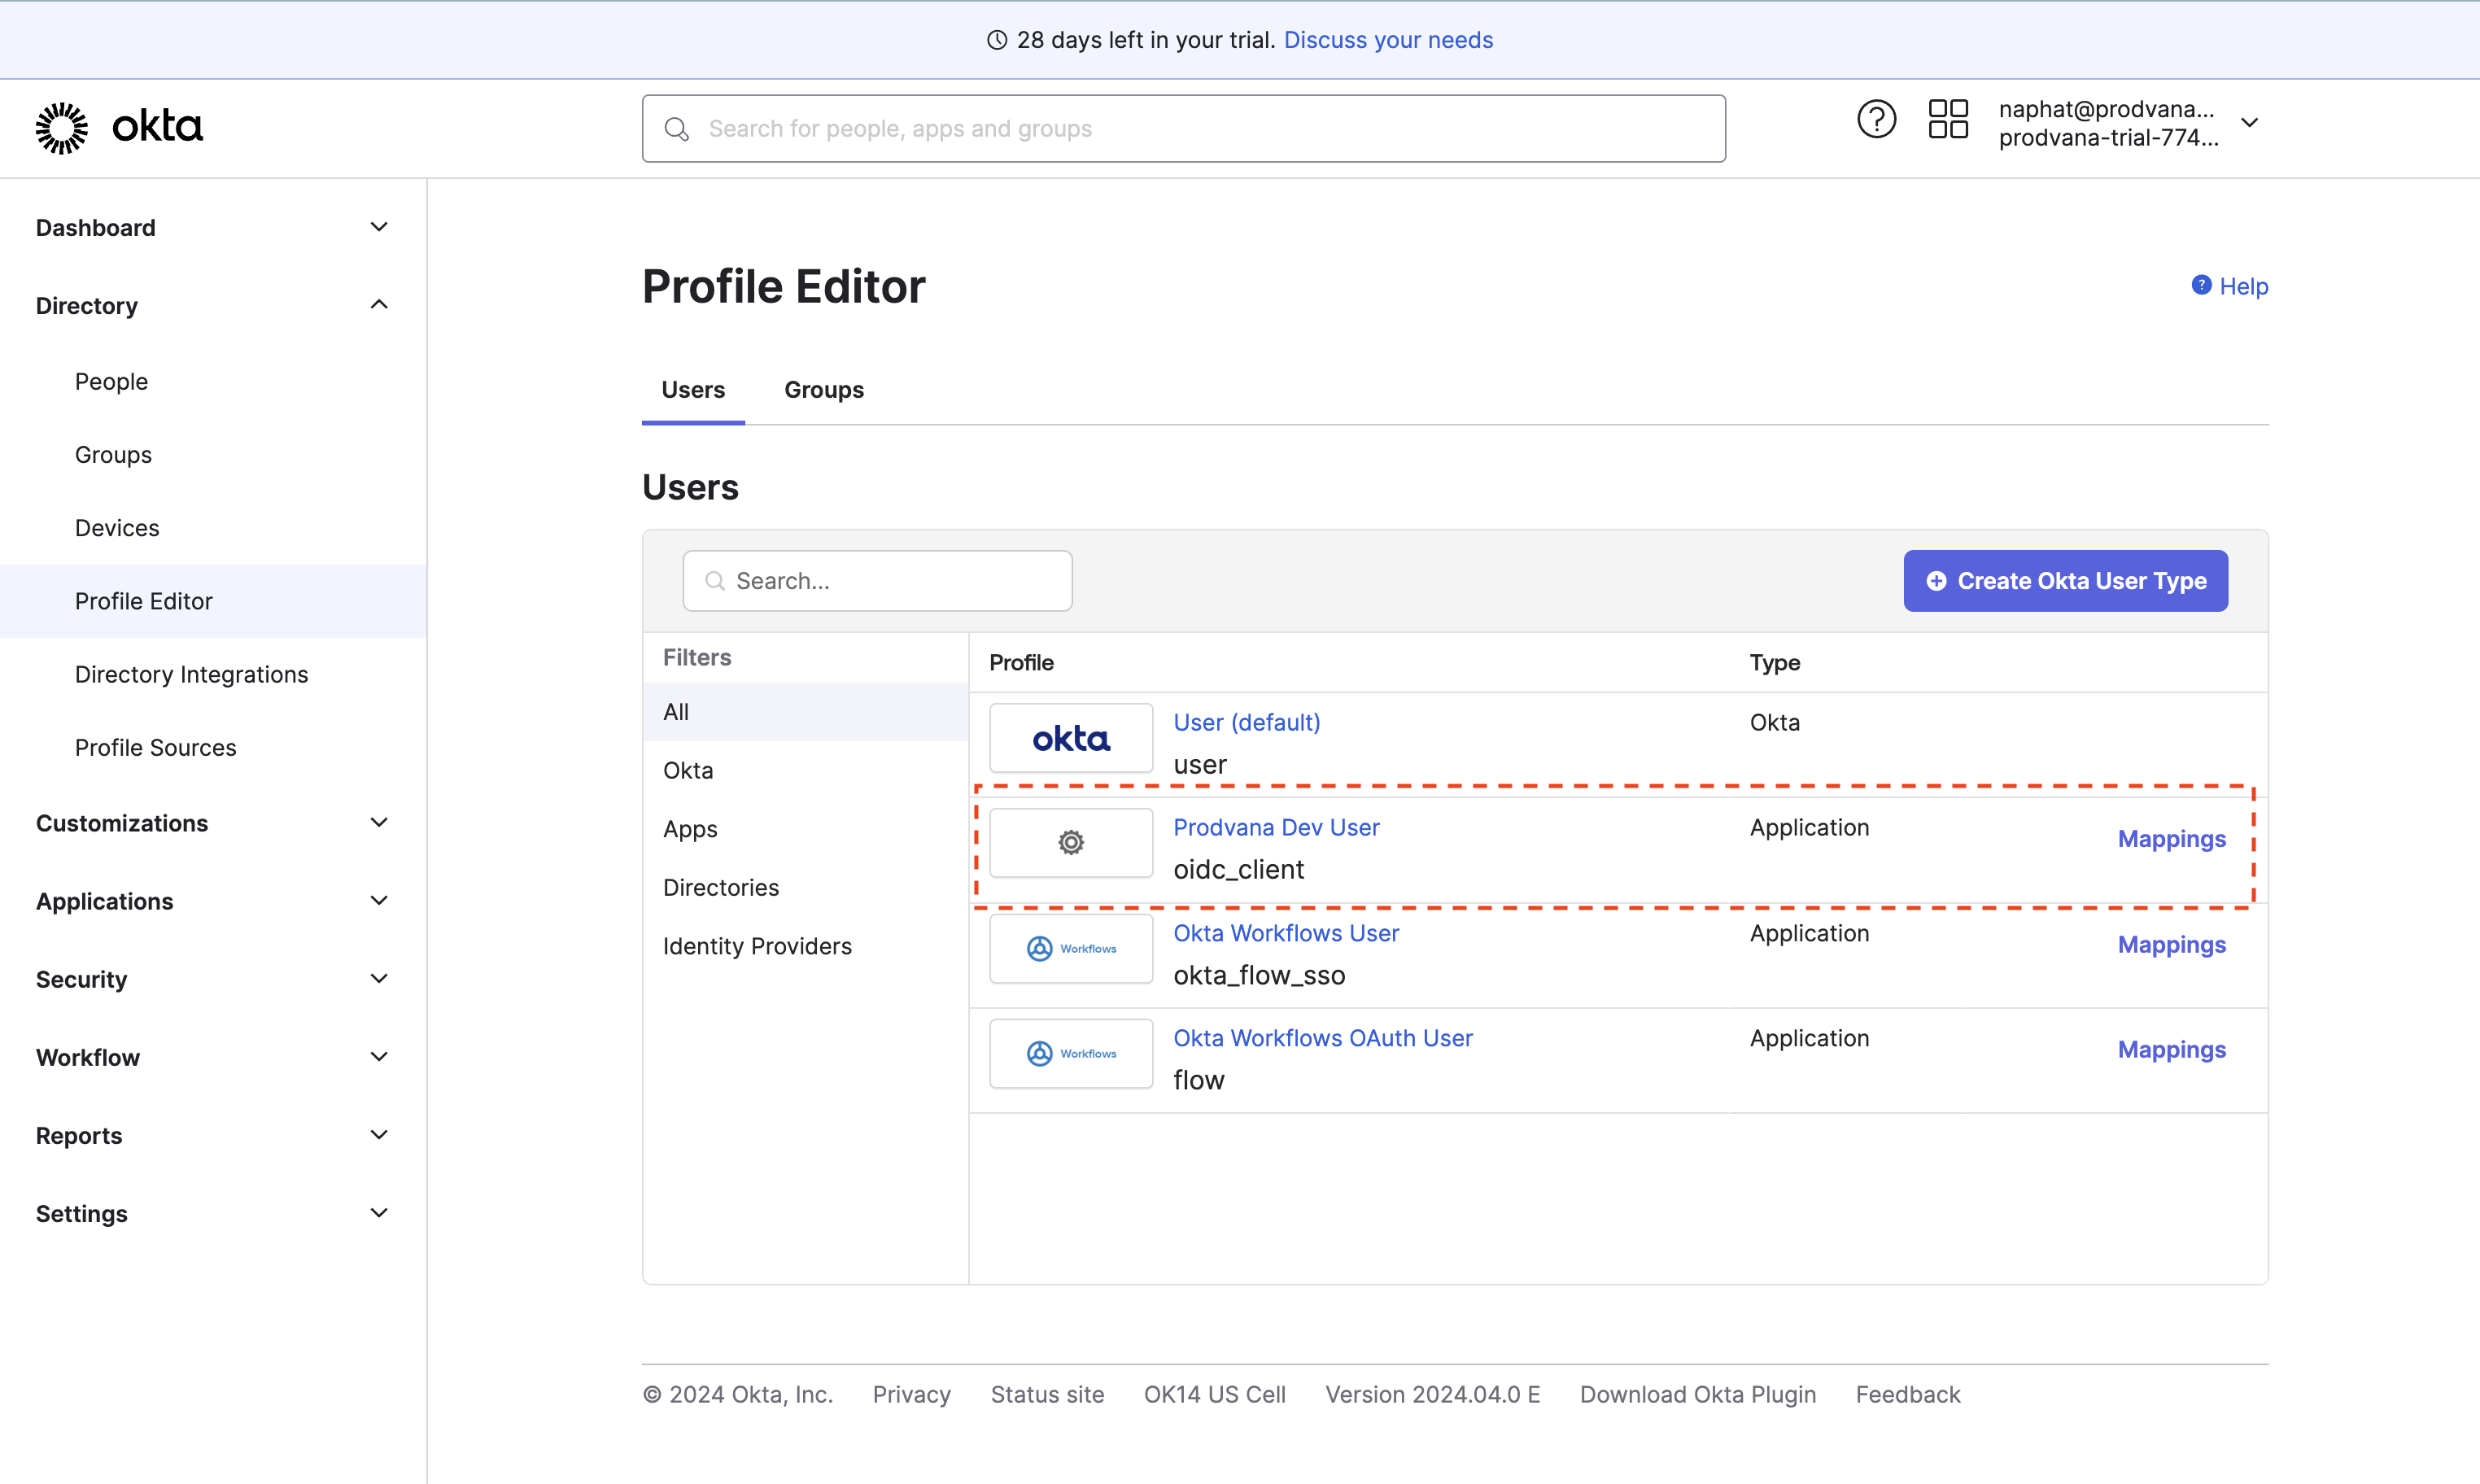
- Click "Add Attribute" and follow the same instructions as step 2.
- Click "Mappings" and add the mapping for prodvana_role.
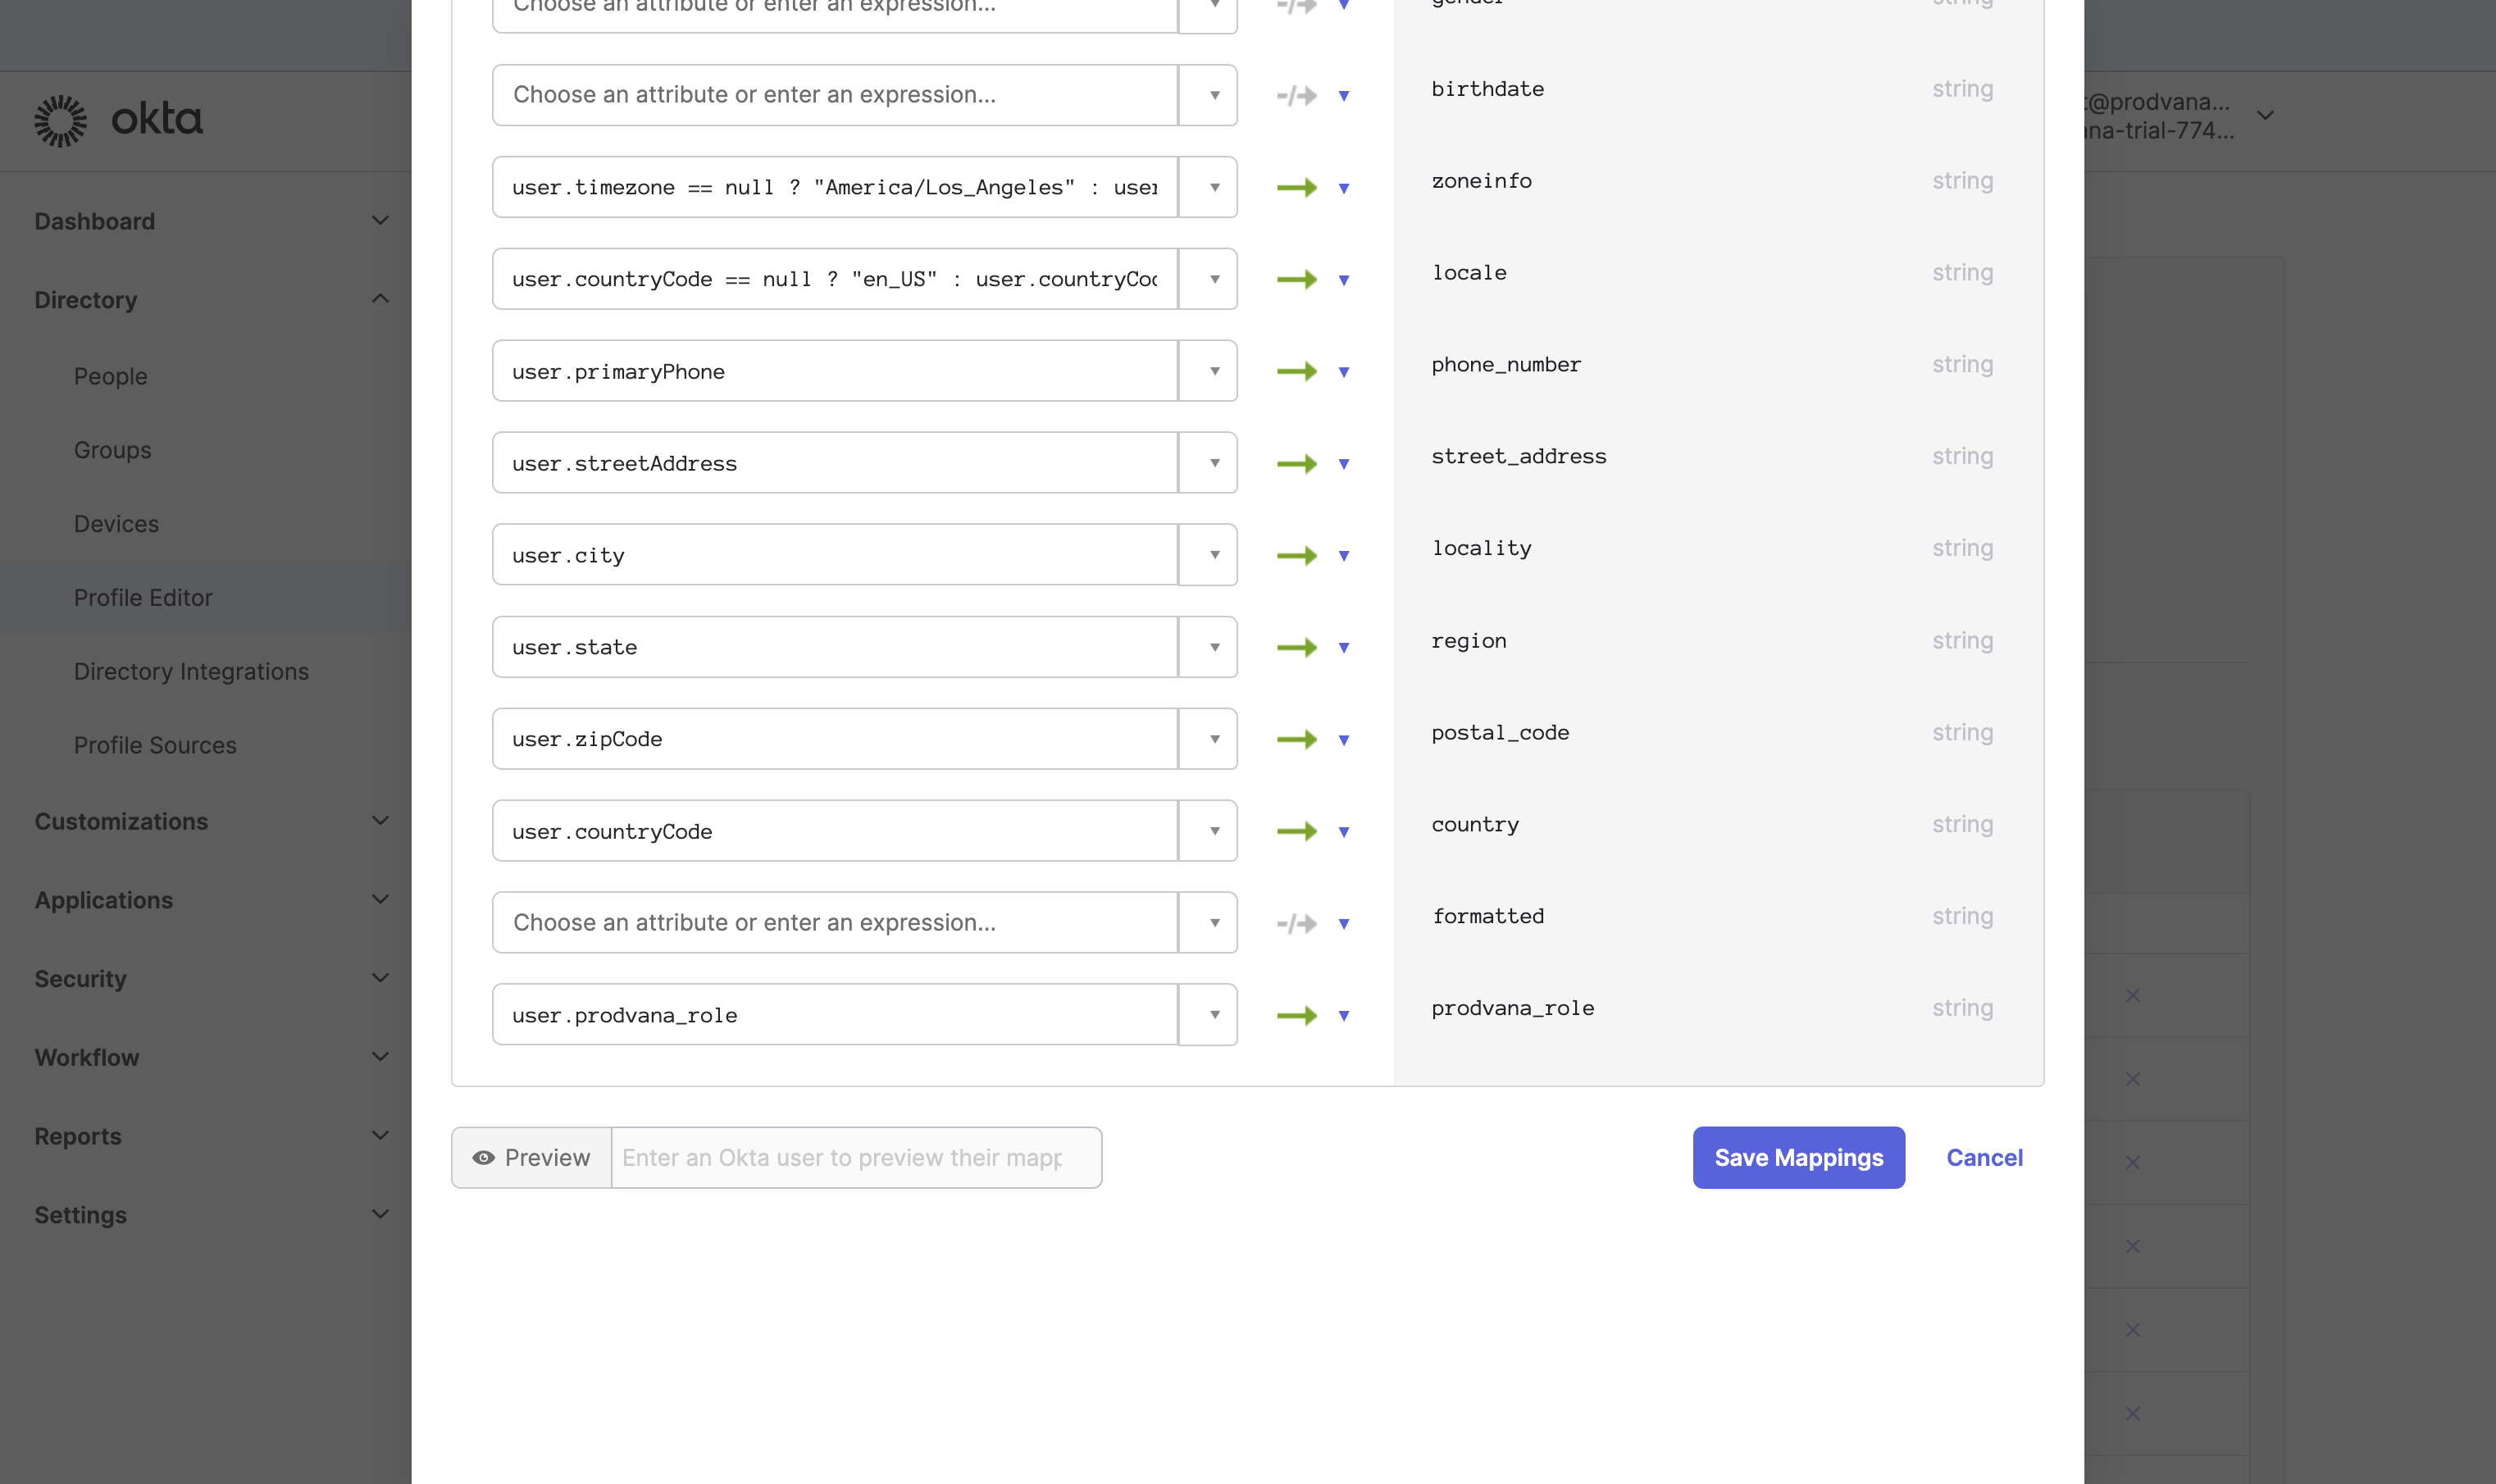
You can now assign roles to users inside Okta, which will take effect next time they log in. If you manually modify roles on our UI, it will eventually get overridden with values from Okta. You can customize the above setup to match your organization needs, such as mapping roles based on groups, as long as you continue to forward prodvana_role to the oidc client.
Updated about 1 year ago